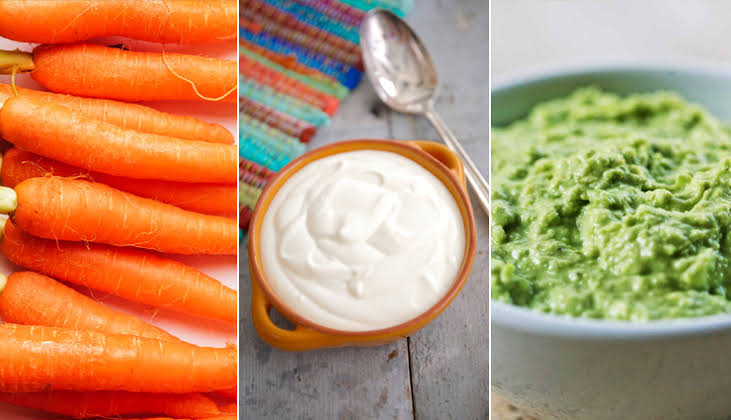
Carrot and avocado mask for dry skin

This great mask for dry skin contains just a few of our most popular ingredients. Among the components of this mask are antioxidants, which greatly help in combating aging. Carrots are also rich in potassium, which prevents skin dryness and has anti-inflammatory properties, which helps revitalize the skin. Follow with us the steps of this mask in order to enjoy fresh skin free of any dryness.


* Ingredients:

– 1 peeled and mashed carrot.


– 1/2 of an avocado.


– 1 tablespoon of honey.


– 1/2 tablespoon of olive oil (ie

Oil can do the show (except vegetable oil or coconut oil)


– 1 teaspoon of lemon juice.


– 1 egg yolk


* How to prepare :


– Flatten the carrot by steaming or boiling so that it is easy to mash.


Mash the carrot with a fork until it becomes creamy, or put the carrot in a blender until it forms a paste.


Mash the avocado with carrot pulp.

Note: The avocado must be well ripe


Hard to mash with a fork. In this case, I recommend putting unripe avocados with

Carrot in the blender until it is blended.


Then add honey, lemon juice and egg yolk and mix these ingredients well by hand.


Then spread the mask on a clean face for 15 minutes.


During the waiting period, you can mash the remaining half of the avocado with lemon and sea salt and enjoy it as a snack while you are waiting for the mask to finish.


Finally, wash your face from the mask with a warm cloth and remove the dry skin with it, then apply the moisturizer.

A natural toner for acne, make your own

A natural toner is perhaps the most effective step in acne care. In fact, it is essential to prepare an acne treatment toner in your daily beauty routine. A natural toner is an ideal solution to renew your skin barrier after cleansing and prepare your skin for applying makeup to overcome this problem.

Instead of spending a lot of money on acne cleansers and various creams and not resorting to the natural ingredients in your kitchen, they are much cheaper and very effective, and you really do not need to spend more money on skin products so as not to affect your skin. Skin care products can be prepared at no cost as they are not only cheap but also healthier. Because most skin care products contain parabens, chemicals, perfumes, toxins, and certainly when applying these products to the skin.

Toner recipes for acne

1. Apple Cider Vinegar Toner:

Mix 1 tablespoon of apple cider vinegar in a cup of water and stir until they are mixed and get a solution. Using a piece of cotton, you can wipe the face with the mixture.

2. Mint leaves:

Boil 6 cups of water and add a few mint leaves to the water while it is hot. Use a piece of cotton mixed in the mixture and wipe the face with the cotton until you distribute the solution on the face evenly.

 3. Lemon juice with mint tea:

As we mentioned above, mint is one of the ingredients that you can use as a natural acne toner. Take a tablespoon of lemon juice with mint tea and 1 cup of hot water and mix them together and allow it to leave for a few minutes. Remove the tea bag from the water, add lemon juice, mix well and allow the solution to cool. And use a piece of cotton soaked in the solution to wipe the face.

4. Aloe vera:

Prepare a slice of aloe vera to extract aloe vera gel and dilute 2 tablespoons of aloe vera gel in 1 cup of cold water and apply this solution on the face using a cotton swab. This mixture acts as a balm to treat sunburn and rashes.

5. Option:

Take 2-3 fresh cucumber fruits and cut them into small pieces, pour a cup of water into a bowl and add the chopped cucumber. Heat the pan for 8 minutes until the water begins to boil to mix the cucumber and water. Leave the mixture to cool and then filter the juice to get water. Using a small piece of cotton, the mixture is applied to the face.

6. Cold water:

Use a piece of cotton and put it in a glass of ice water. And simply rub the face with a piece of cotton or take an ice cube and use it in a facial massage.

7. Camphor and rose water:

Mix a small amount of camphor in a bottle of rose water and apply this solution to your face after each wash.

8. Raw Mango Seeds:

Take the seeds of 2 mangoes and put them in a pot with 3-4 cups of water and boil for 30 minutes. Then leave the liquid to cool and then filter it. Use the solution resulting from soaking mango seeds to apply it on the face with a cotton swab.

9. Banoji:

Boil a bag of chamomile tea in a cup of water for 4 minutes. Leave the chamomile mixture to cool down, then store the tea in a spray bottle and apply this solution on the face with a cotton swab after each wash.

10. Lemon juice:

Dilute 1 tablespoon of lemon with 1 cup of water. Apply the solution to the face using a cotton swab. As an alternative to these steps, you can rub the lemon peel on your face and wipe any residue with a damp cotton pad. This toner helps you remove skin tan and excessive sebum activity, thus preventing acne breakouts.

11. Castor oil:

You can do this for three days in a row to treat acne. When applying castor oil, it eliminates pimples. Castor oil closes the pores of the skin and gets rid of oils. Castor oil contains natural ingredients that are healthy for your skin. You can use any brand of castor oil, all of them have effective results for the skin.

12. White vinegar and rose water:

Add a tablespoon of white vinegar to a bottle of rose water and use this toner on the face after each wash.

13. Green tea:

After washing the face, it is recommended to apply a green tea toner to prevent acne breakouts. Because it keeps the skin healthy and free of sebum, it also prevents the appearance of acne and creates an ideal base for moisturizing the skin.

14. Rice Water Toner:

You can prepare rice water to get rid of the excess sebum in the skin, and all you need is an amount of rice for this. Wash the rice once, then take a cup of rice water solution and apply the solution on the face using a piece of cotton. It is preferable to apply the toner at night in order to help you improve the texture of the skin and eliminate acne.

Tips for treating acne:

Eliminate clogged pores:

You can use natural ingredients such as strawberries and tomatoes, as they are natural sources of salicylic acid. Salicylic acid helps prevent the formation of acne-causing bacteria, making it a staple in acne products. By using home masks that contain these ingredients, you can get rid of dead cells so that they do not become stuck in the pores.

Eliminate skin irritation:

You can use medicinal ingredients such as tea tree oil and lavender oil to reduce the inflammation and redness associated with acne breakouts. You can use aloe vera or oatmeal to stop itching and redness. Another excellent ingredient for acne is neem oil. Neem is antibacterial and prevents some skin diseases such as psoriasis and eczema, soothes the skin and prevents acne breakouts.

Reduce excess sebum:

When you consume sunflower oil in salads or baked goods, it helps soften the skin, making it more sticky and making it less prone to clogging the internal pores. You can also use a home lotion for the skin, which consists of almond oil, apricot, sunflower oil and honey to relieve clogged pores.

body hydration:

If your goal is to get rid of toxins in the face because it is one of the causes of acne, so we recommend drinking large amounts of water daily. It helps to get rid of toxins that accumulate in the body, and this has great results in treating the skin.

Acne lotion preparation

You should be careful about what you put on the skin, especially the chemicals in soap and face wash that interfere with the action of natural oils and hormone levels and ultimately irritate the skin. You can make a lotion using apple cider vinegar, a natural cleanser, to activate the pores and remove excess oils. Coconut oil also contains a sufficient amount of vitamins and antioxidants that reduce acne-causing bacteria on your skin and support overall skin health.

Relaxation:

The body is subject to daily stress as a result of life stresses, and this anxiety leads to acne. For this you need to rest for 8 hours. So that the body has the ability to resist toxins that harm the skin. It resists signs of stress that appear on the face. There is a recommended number of hours to add to your daily routine, which is sleeping from 9 pm to 5:30 am.

Use of anti-bacterial agents:

Tea tree oil, lavender oil, rosemary oil, and neem oil all contain natural antibacterial and antibacterial elements. Especially tea tree oil. Honey has also been used for a long time as an antibacterial. Honey contains active compounds that have high antibacterial properties and also moisturizes the skin.

Bananas also contain a high percentage of potassium, which is a bacteria inhibitor. And yogurt contains bacteria that resist acne microbes. It is known that spices, including basil, parsley and turmeric, also fight acne-causing bacteria, and they can be added to home masks.

cell regeneration

This mask is very useful for treating acne because it relieves you of stress caused by acne. You can mix 4 tablespoons of kelp powder with half a cup of aloe vera gel and 3 tablespoons of distilled water until it becomes a thick paste and apply it on the skin and leave it for 15 minutes and wash the face with warm water

Make makeup removal wipes at home

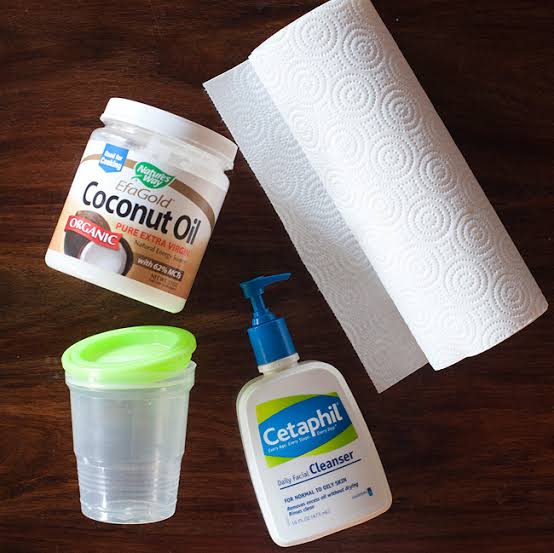
Most of us do not carry a pack of facial tissues with him constantly in his bag when going out. There is no doubt that it is a useful way in our lifestyle that goes in quick stepso. Also, these tissues are very expensive when you want to remove face makeup and are unhealthy. You need to prepare make-up removal wipes yourself at home. Because it is very logical to carry makeup removal wipes with you constantly because it is a good way to maintain and take care of the health of your skin. You are in order to get rid of the effect of spending a long day before going to bed. You need to use makeup removal wipes that cause more damage to your skin than achieve benefits, especially when used near the eye area, as it is a sensitive area where the skin becomes thinner and more prone to the appearance of fine lines and irritation. Instead of using commercial wipes, you can choose natural wipes that contain light oils on the skin.And also an alternative provided for you. Instead of getting expensive commercial wipes, you can save money when you prepare makeup removal wipes yourself at home.

Make-up removal wipes

Ingredients :

  • Microwave bowl.
  • Distilled water.
  • Coconut Oil .
  • Plastic container with lid.
  • Roll paper towels.
  • Multi-use knife.

Steps:

In a microwave-safe bowl, mix 2 tablespoons of pure water, 2 tablespoons of coconut oil, and 2 tablespoons of baby wash. And do not forget to warm the mixture in the microwave for a few seconds while stirring.

Measure the tissue paper to fit the container and often need a sharp knife to fit the tissue cutting.

Put the roll in a bowl and pour the make-up removal mixture into it until the tissues are soaked for 5 minutes, then stop the soaking and remove the cardboard in the tissues.

Cut a small X-shaped hole and now the makeup removal wipes are ready to be used with ease.

Second description:

  • Suitable mixing bowl.
  • 1 teaspoon of aloe vera gel.
  • 3 teaspoons of witch hazel powder.
  • 1 teaspoon of coconut oil.
  • 8-12 drops of lavender essential oil.
  • 1 teaspoon of vitamin E oil or 8 drops of rosemary oil.

Steps:

Combine the ingredients together Put the cotton pieces in a jar and shake well until they are mixed. Once the ingredients are mixed, you can put the cotton pieces to immerse them in the mixture and use them to remove makeup in a quick way.

Natural ways to remove makeup:

Make-up removal wipes may seem easy and convenient, but in reality, they can irritate your eyes and damage the skin over time. Because of the presence of active ingredients in makeup removal wipes, the skin is exposed to many problems. Thus, wipes become annoying to many, especially those with sensitive skin and dry skin. Here are a few natural ways to remove makeup on your own at home and rejuvenate your skin without using chemicals:

1. Natural cleansing oil:

Of course, any type of disinfectant leads to the disposal of natural oils. This causes the skin to become very dry and you have to use a topical moisturizer. Or it causes the skin to start producing more oil, making it extra oily. There are plenty of oil-free products out there but this can damage your skin and lead to premature aging. Therefore, it is preferable to use natural oil in order to maintain the youth of your skin and its glowing and vibrant appearance. You can use any of the natural oils, such as olive oil, coconut oil, to enable you to clean the skin without over drying. It is also very effective in removing all forms of make-up, whether lipstick or mascara.

2. Milk:

Of course, milk is a wonderful ingredient for the skin and milk baths are one of the most popular ancient ways for women to take care of the beauty of the skin. There are fats and proteins in milk, especially whole milk, that help moisturize the skin and allow your skin to retain moisture. While drinking milk may exacerbate certain skin problems such as acne, eczema, and topical use helps soothe. You can add a tablespoon of almond oil to a bowl of milk and rub the face with a cotton swab dipped in this mixture. Thus, you leave your face fresh and free of make-up.

3. Honey and Baking Soda:

A mixture of honey and baking soda is a natural makeup remover that works great with any type of makeup applied to the face. Put an amount of honey on a clean cloth and sprinkle an amount of baking soda and use the mixture to remove makeup.

4. Vaseline:

Use Vaseline to help you remove make-up, especially eye make-up. You may need to be careful while using this recipe because Vaseline is very thick and can clog the pores of the skin. So when you use Vaseline to remove makeup, make sure to use a face cleanser.

5. Tomato:

If you have tomatoes at home, you can cut the tomatoes in half and apply them on the face, but you can only use them to remove foundation. One of the best home remedies for removing makeup.

6. Cucumber:

There are many beauty products that use cucumber to help you remove makeup. So instead of going to the store, you can look at the refrigerator. Cucumbers have anti-inflammatory properties, thus helping you calm irritated or acne-prone skin. You can turn a cucumber into a paste and use it as a face cleanser. And if you have makeup that is difficult to remove, you can add a little milk or olive oil to the milk

7. Mixture of oils:

Make a mixture of oils together by mixing equal amounts of canola oil, castor oil, and olive oil together to get a natural makeup remover and use it to remove face makeup effectively. It is a quick solution that you can include in your daily routine.

8. Almond Milk:

Almond milk is a wonderful remover for the entire face makeup by applying almond milk on a piece of cotton and passing it on the entire face. It may take you several attempts to be able to completely remove the face makeup.

9. Almond juice and rice milk:

Add an amount of rice milk and an amount of lemon juice and stir to mix them. Apply this mixture on the face using a piece of cotton to effectively remove facial makeup, but the eye area should be avoided. Lemon juice is said to reduce freckles.

10. Yogurt:

Yogurt is one of the basic foods that has a great effect on your skin and results in a lot of benefits. You can use yogurt to increase skin hydration and is ideal for relieving sunburn. You can take a piece of cotton and dip it in yogurt, then distribute the cotton all over the face in a circular motion and rinse with cold water.

11. Grape seed oil:

One of the light removers to remove make-up easily is to use grape seed oil by using a cotton swab in order to absorb grape seed oil easily and clean the face properly. You can use grape seed oil to remove makeup on the entire face to prevent acne and get rid of acne.

12. Jojoba Oil:

When diluting jojoba oil in water, mix 2 tablespoons of water with 1 teaspoon of jojoba oil to mix them together and use the mixture to remove makeup.

13. Witch Hazel:

One of the effective ingredients in removing make-up is the use of witch hazel and it works to improve the skin, lock moisture levels and clean acne compared to other oils. All you need is 2 tablespoons of witch hazel oil and 2 tablespoons of carrier oil such as jojoba oil, olive oil or almond oil with 2 tablespoons of pure water and to combine these ingredients in a bottle before use. To remove makeup effectively, you can use a cotton swab and soak it in the solution to remove makeup.

14. Avocado:

You will notice that many makeup removal products contain avocado oil in them. If you do not have avocado oil, you can use avocado directly and remove makeup. Or use a piece of cotton to soak it in avocado oil to remove makeup.

15. Olive oil:

Olive oil is one of the best oils for removing makeup, especially eye makeup, foundation and lipstick. Make sure not to use coconut oil, as it is a good household oil to use.

16. Baby shampoo:

You can use baby shampoo to remove eyelid makeup. It is a good and safe option for you. By adding a few drops of baby shampoo with 1 cup of water, mix well in a cosmetic bottle, and shake the bottle before use. Using a coop, you can start the application.

17. Coconut Oil:

Coconut oil is rich in natural antiseptic elements, it is anti-fungal and anti-bacterial and has great benefits for the skin. By taking two tablespoons of coconut oil with 2 tablespoons of baby shampoo and 2 cups of water, put the ingredients in a microwave-safe bowl and mix the ingredients together to wipe the makeup with 

Home coloring: mistakes to avoid

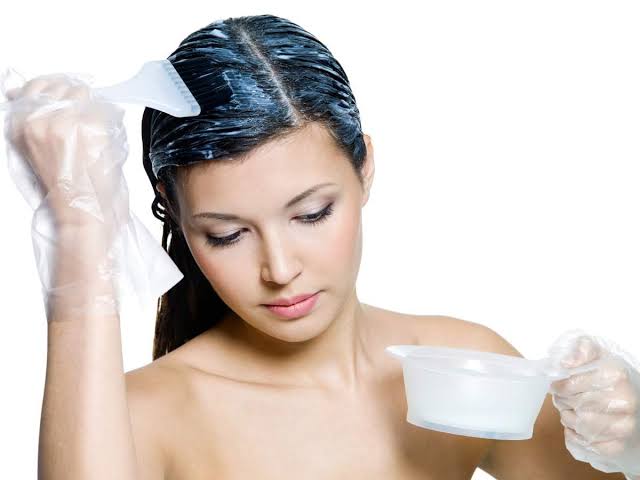
You are a very active woman, your agenda is full but no appointment with the hairdresser is included … And for good reason: three hours of waiting for coloring! It will be quicker to make it yourself at home!

If this is the case, BE CAREFUL because there are mistakes not to be made when choosing your coloring… Errors which can affect the expected result for your hair.

If you want to have beautiful hair with a much more intense and beautiful color, but also to prevent any health problem for your hair, you should not go wrong when choosing your coloring, nor neglect the break.

Here are the mistakes to avoid.

CHOOSING THE WRONG COLOR

Choosing the right color is a tricky step, and a number of factors will play a role in the final result, which may explain why certain tones don’t suit you in the end.

The golden rule to follow when you change your hair style and color: choose a color no more than 2 shades lighter than your current hair color, or 2 shades darker. If you do not adhere to this rule, you may end up with unnatural color after coloring. We strongly recommend that you use your skin tone to choose the right color. Example: No need to opt for platinum blond if you are rather very brunette or raven black if you have a milky complexion…. You can imagine the result, don’t you?

 HOW TO BLEACH YOUR HAIR AT HOME

This is one of the fatal hair color choice mistakes for the health of your hair. Indeed, bleaching is a very aggressive process that should not be abused if you do not want to burn your hair, make it dry or abuse it too much.

This damage can be accentuated if, in addition, you do not carry out the discoloration correctly: for this it is better to rely on a professional stylist or a hairdresser. However, some dyes can lighten hair by two tones if you have particularly dark hair, and up to four if your hair is naturally very light.

Clearly, if you want, for example, to change the hair color from black or dark brown to blond, you must bleach them and then apply the dye. This will prevent your hair from having an orange-red color.

hair-coloring-620x330

DO NOT PROTECT YOUR HAIR AND FACIAL SKIN

Do you have the habit of protecting your hair before drying it with a hairdryer or curling iron? The same should be done before coloring. You will prevent the chemical components of the dye from damaging and weakening the fibers in your hair. Many protective products exist for your hair: Do not hesitate to get some and apply it to your hair before coloring to keep it in perfect condition.

If your hair remains healthy, coloring will not affect its appearance and the end result will be more flattering and luminous. Take the opportunity to hydrate your hair ends, you will get radiant hair.

When you color your hair, there is oxidation. The product colors your hair. But not only. If applied incorrectly, it can also stain your scalp and even the outline of your face. To avoid this, use a very rich, even oily moisturizer. And apply it all around the face where the hair is implanted. Don’t forget to put it on and behind the ears.

DO NOT TEST BEFOREHAND

The chemical ingredients found in many of the dyes available in stores can irritate the skin of the scalp and cause a very bothersome allergic reaction.

To avoid this, you can simply do a little test before you dye your hair. Apply a small amount of the dye behind the ear and wait about 48 hours to see how the skin reacts to the product: if you find the product irritating, then don’t use it and get a new, more natural one. possible.

3130-how-to-catch-up-a-coloring-failure-article_faq-2

INCORRECT APPLICATION OF THE COLORING

How to apply the coloring is very important if you want to achieve a uniform, intense and beautiful color, and can lead to disasters when not done correctly.

It is advisable to be methodical and apply your coloring 4 strands by 4 strands, applying the product from roots to ends. Read the instructions on the dye package and follow them throughout coloring.

Women who only need to color their roots should not apply the dye to the rest of their hair, otherwise they could run the risk of having hyper pigmented locks of hair and having certain areas of your hair. hair darker than others.

If this all sounds way too tedious, take some time for yourself and have your hairdresser pamper yourself.

Make natural keratin for hair at home

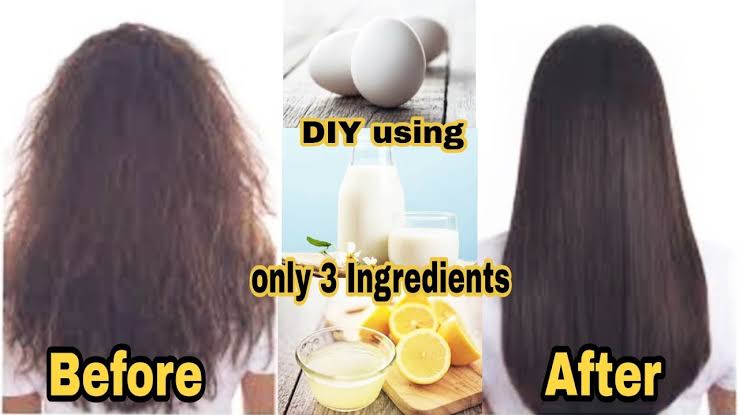
We offer you a natural way to straighten hair that dispenses with the use of chemicals and is a natural alternative to keratin. Learn about the steps to prepare it with us, according to the “beauty care” website.

Ingredients:
Two tablespoons of castor oil.
Two tablespoons of watercress oil.
Two tablespoons of olive oil.
Two tablespoons of coconut oil.

Method of preparation
– Mix the four oils together and leave it for three full days before use, apply the mixture to your hair when it is completely dry.
Leave the mixture on the hair between 2 and 3 hours.
Make sure to cover your hair with a plastic cap to take full advantage of the benefits of the ingredients, then wash your hair with shampoo and then conditioner.
Repeat the mixture three times a week and you will notice the difference after one week.

Effective natural mouth sanitizer
How to Make Natural Homemade Sanitizer

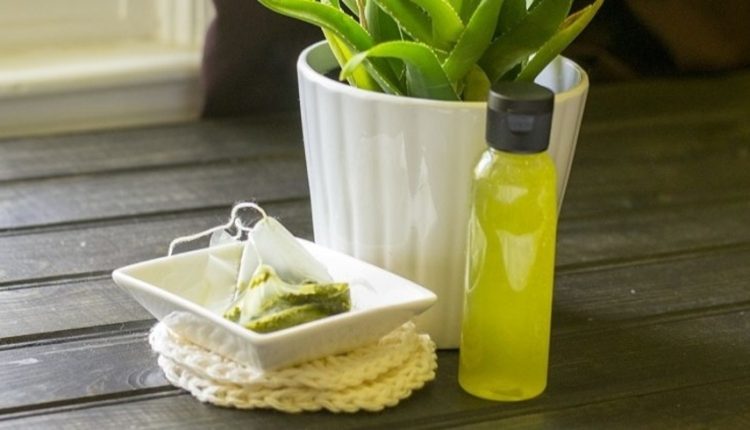
Learn how to make sanitizer that is natural and simple. This homemade sanitizer works, it saves money, and fights cold and flu! 

DIY NATURAL HOMEMADE SANITIZER

Aesthetic teeth are one of the very important things that every female seeks and desires very much, but obtaining them requires a lot of expenses to whiten it and get that integrated smile, but there is always a solution for everything, including this powerful recipe.
Ingredients: several orange peels + a spoon of bicarbonate of soda + a spoon of peppermint oil
Method of preparation: Mix these ingredients well with a quantity of water and put the mixture in a bottle inside the refrigerator, and you can use it to rinse the mouth after cleaning it with toothpaste and a toothbrush.

Breast enlargement without surgery…natural recipes

Many women’s efforts continue to find out the best natural ways to increase breast size, to avoid resorting to surgeries, which usually have more harm than benefits in addition to being expensive, so today we are talking about a natural and safe ingredient that can be relied on in breast enlargement  very quickly and safely.

Rosewater for breast augmentation

In the following lines, we will reveal to you the benefits of rose water for breast augmentation and how to use it, so follow us.
Rosewater and fenugreek recipe for breast enlargement: To apply this recipe, you need a set of ingredients: a full cup of rose water, 2 tablespoons of ground chickpeas, 2 tablespoons of crushed fenugreek, 2 tablespoons of orange peels, and finally 2 tablespoons of peels lemon, then follow these steps to prepare the recipe:
Put all the previous ingredients in a pot and mix them well, put the pot on low heat and leave it until all the ingredients overlap. Remove the mixture from the heat and leave it for some time to calm down a little and cool down. Start applying the mixture on your chest, by massaging it in circular motions using your fingertips, Make sure to massage quietly and not violently. Leave the mixture on your chest for 10 minutes, then wash your chest well and get rid of the effects of the recipe using lukewarm water. To get the best results, you should follow this recipe twice a week, and you will feel the difference yourself within a month of use.