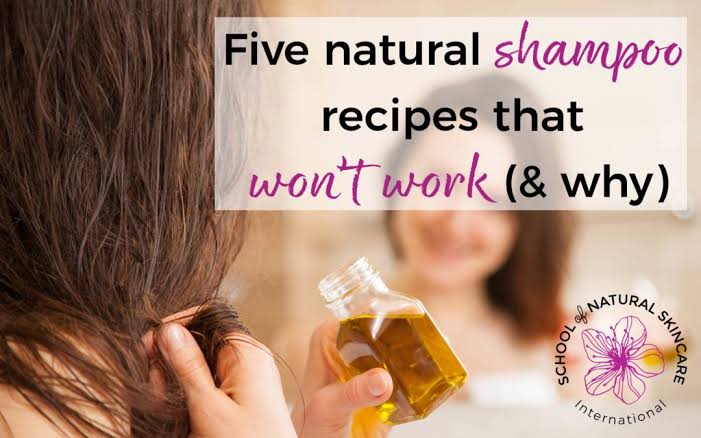
Hair Care with Herbs

How to care for hair with herbs? Can it stay in the hair while doing hair care with natural herbs, or should it be rinsed?


After taking a look at the products with “chamomile” or “lavender extract” on them, we do not hesitate to try once, no matter how expensive. However, we can make the most natural herbal hair care serums in our own home and get good results at a much more affordable price.


The only difference between the colorful boxes that make us get lost in the world of cosmetics is that they have a long shelf life. The hair lotion we will prepare can only last for one day. Let’s find out how it can be prepared fresh and used daily:


How to care for hair with herbs?


Herbal hair care will be a great hair tonic for those who say how to do it at home. It is one of the most valuable herbal hair care cures.


1 liter of boiled cooled water1 tablespoon of thyme1 tablespoon of lavender1 tablespoon chamomile


Crush dried thyme, lavender and chamomile into boiled and cooled water.


Close your mouth and let it rest for 4-5 hours.


After shampooing, pour into your hair and leave without rinsing.


This hair care you have applied will nourish your hair and help it shine. Especially people whose hair is shed and worn by being exposed to chemical processes can easily apply and get results in a short time.


We said how to care for hair with plants and gave a wonderful natural hair tonic recipe. Be sure to try it. You will be very pleased with the results.


Dry Skin Honey Mask

How to make a dry skin mask? Which of the dry skin mask recipes is the most effective?


Are you ready for a moisturizing homemade mask recipe for dry skin?


Although it may seem very difficult to care for, in fact, dry skin only needs moisture. Although those with dry skin prefer many water-based and oil-based creams, the skin reacts to all products. It peels off, stretches, cracks, wrinkles.


There are also those who try to reduce the tension of their skin by applying oily creams many times during the day, but the skin, which absorbs the cream like waterless soil, is stretched again. Dry skin needs moisture, not oil. Daily moisturizers are not enough to give the skin the moisture it needs.


How to make a dry skin mask?


Honey and butter will be medicine for your skin. Just follow the mask’s description exactly and keep applying it consistently.


Dry and sensitive skin mask


Mix a spoonful of unsalted butter with a spoonful of honey to form a creamy consistency. Apply all over your skin, including the décolleté area.


After your skin absorbs the mask, repeat the same process a few more times.


Wash it off for half an hour.

Thanks to the moisture mask that you can do 2-3 times a week, your dry skin will relax and store intense moisture.


⇒  Dry skin care requires special care. Therefore, you need to be very careful in choosing it. If possible, choose products that do not contain alcohol.


Moisturizing masks are essential for dry skin care.


When cleaning your skin, choose milk and cream forms instead of foam cleansers.


Do you like our moisturizing homemade mask recipe for dry skin? If you haven’t used it yet, be sure to try it. 🙂


What To Do To Strengthen Hair-Hair Wash With Carbonate

Are you ready for a very simple formula to strengthen hair ? Şems Arslan, who recommends the method of washing hair with baking soda to strengthen the hair, will again be the crown of our heads. 🙂


Shampoo recipe to strengthen hair


• 1 teaspoon of baking soda


• Half a glass of hot water


Mix 1 teaspoon of baking soda with half a glass of hot water.


Wet your hair a little first.


Slowly pour it into your hair.


Massage it into the bite with your fingertips. Until you feel a slight lather on your fingertips. Never touch your nail tips.


Leave this carbonated water on your hair for a few minutes and then rinse it off.


Now it’s time for the final processing.


Natural ways to strengthen hair


• 1 teaspoon of vinegar


• 1 glass of water


Again, mix 1 teaspoon of vinegar with 1 glass of water and pour it into your hair.


Do not rinse this vinegar water; keep it in your hair.


Wrap your hair with a towel.


The whole process is that simple.


Carbonated mixture is a natural shampoo. Therefore, do not wash your hair separately with shampoo or soap.


√ At the same time, baking soda will stop your hair from falling out and revitalize it.


√ Weak hair roots will be fed.


√ You will witness that your hair has also grown.


√ The next vinegar phase is; It will make your hair shine.


√ It will ensure that all chemical wastes in your hair are purified.


√ It will help your hair breathe by opening the pores.


√ If you apply this cure regularly, you will not believe the difference in your hair in 3 months.


√ In the first 10 days, your hair may feel a little heavy. However, after that, both you and your hair will get used to the baking soda and it will be indispensable.


Who can wash their hair with baking soda?


√ Those whose hair is tired from chemical treatments


√ Hair loss and thinning


√ Those who have serious illnesses and are taking medication


√ Hair loss from the side effects of drugs


√ Anyone who wants to use natural materials can do this carbonate care.


√ Those who say how to thicken hair follicles, apply this method.


First, rinse your hair thoroughly with a towel and dry it.


√ Do not use combs afterwards; Use your fingers instead of a comb to separate your hair strands.


√ While doing these operations, tilt your head down and let your hair fall forward.


√ Finally, apply small strokes to the ends of your hair using the outermost part of your hand (from the little finger to the wrist).


√ Now you can throw your hair back.


√ You won’t believe how harmonious, shiny and soft your hair is.


√ If possible, do not use a hair dryer.


What to eat to strengthen hair?


5 nutrients that directly affect hair:


• Spinach


• Broccoli


• Celery leaves


• Walnut


• Pumpkin seeds


You can take these five foods individually or together by making them into a salad.


If you say what to do to strengthen the hair, oils, herbal solutions and natural masks will be very effective.


That’s it from us.


To the information of dear Şems Arslan


Bless the eyes of you, our readers, who follow us… 🙂


What to Add to Shampoo: Honey, Olive Oil, and Yeast

What goes into the shampoo? What good does it do to put salt, sugar and aspirin in shampoo?


Many of us complain about the lack of time and want the products we use for hair care to be practical.


We want our hair to be nourished and easy to shape thanks to the products we use with every wash. If you add these ingredients to your shampoo, you can have much fuller and well-groomed hair.


You can also share the ingredients you add to your shampoo and their results via fiskosta.com in the comments section below.


fine hair


What does adding dry yeast to shampoo sound like? 🙂


If your hair is very thin, constantly shedding and sticking quickly, thanks to this formula, it will both be nourished and easily shaped and form. Add 1 teaspoon of dry yeast and a little water to a bowl and leave for 10 minutes.


Add this mixture to your usual shampoo. Shake your shampoo before each use. Massage your scalp for 5 minutes and rinse.


Thanks to the B vitamins in dry yeast, your hair will be nourished and look fuller.


You don’t have to add yeast to the shampoo. If you have time, after shampooing your hair, pour the yeast and water mixture on your hair, leave it for 5 minutes and rinse. In this way, your hair will look fuller, it will be easily shaped and nourished.


Have you read our article on Vitamins Good for Hair ? Thanks to these vitamins, your hair strands will become thicker.


Oils mixed into the shampoo will weigh down fine hair. So avoid adding oil to the shampoo.


for hair loss


If your hair is constantly shedding and you do not have any health problems, you can stop your hair loss with vitamin E supplementation. Buy a box of vitamin E from the pharmacy, pierce 2 capsules of vitamin E and pour the liquid inside into your shampoo.


Again, shake before each use. Vitamin E will nourish your hair. Vitamin E has the ability to regenerate cells.


If your hair loss is decreasing with this method, we recommend you to take vitamin E naturally. For example, consume a tablespoon of extra-virgin olive oil every day. A handful of nuts eaten daily will also help you get vitamin E naturally.


There are also those who add sugar and salt to the shampoo. Sugar and salt added to the shampoo exfoliate the scalp.


Adding aspirin to shampoo also prevents dandruff. You can try too.


You can crush birth control pills and add them to your shampoo. Although this method is said to increase hair growth, do not use it without consulting your doctor. You need to be careful about the use of drugs containing hormones.


dry hair


If your hair is very dry and the ends are split, it means that it is dehydrated. Add 1 teaspoon of honey and 1 teaspoon of olive oil to your shampoo. Remember to shake your shampoo before each use.


In addition, diluting your shampoo a little will also dilute your shampoo

oily hair

If your hair gets greasy very quickly, use laurel soap. Laurel soap will make your hair oily much later. Soap thickens and nourishes your hair strands. If you have used shampoo for many years, you may find the soap a little strange, but after a while, both you and your hair will get used to the soap. Make sure your soap is natural.

Throw 2-3 bay leaves in your shampoo. Use this shampoo with every wash. Bay leaf will remove the oiliness in your hair and help nourish the scalp.

Adding vinegar to shampoo is also very effective. With the addition of a tablespoon of vinegar, you can prevent your hair from getting greasy.

Also, never wash your hair with hot water. Have your water lukewarm, if possible cold. Because hot water will increase the oiliness of your scalp.


How to Make a Chocolate Mask?

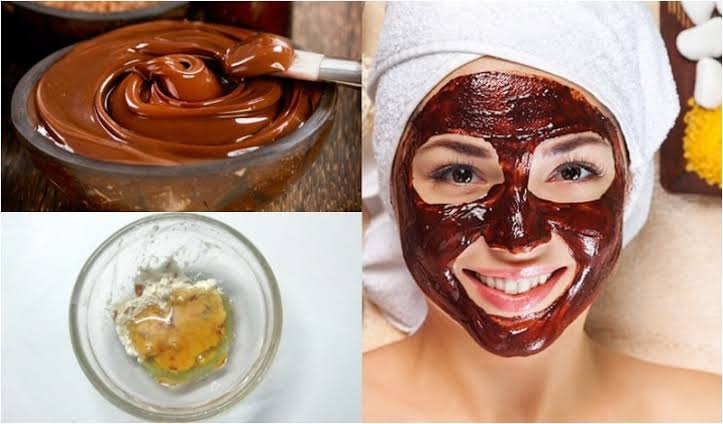
How to make a chocolate mask , what does it do? Rejuvenate with the chocolate mask!


The energy that chocolate gives to the soul is undeniable. Applying chocolate externally as well as consuming it makes you feel very good. Especially in recent years, when the value of natural materials has been understood, you can apply the chocolate mask at home and get very good results.


We shares a wonderful mask recipe with you so that you can benefit from the power of cocoa and chocolate, which are also frequently encountered in cosmetic materials.


How to make a chocolate mask?


We will explain how to make a chocolate mask, but first we have a preparation process!


Cleanse your skin with lemon juice


Cleanse your skin before applying the mask. You don’t need to search for any cleaners. Lemon juice will clean your skin and allow it to breathe, and it will nourish your skin thanks to vitamin C.


As soon as you cut the lemon, extract the juice; Be careful not to wait. If your skin is combination or oily, dip a cotton ball directly into lemon juice, wipe your skin and wash with cold water. If your skin is sensitive, make sure to mix lemon juice with an equal amount of water and apply it to your skin. Now it’s time for the ingredients of the chocolate mask and how to apply it.


Chocolate mask


√ 4 tablespoons of cocoa


√ 1 tablespoon of milk or yoghurt cream


√ 1 teaspoon of honey


√ 1-2 drops of olive oil


Mix all the ingredients and leave for 5 minutes. Then, rub it on your cleansed skin by massaging from bottom to top. Wash it off after 15-20 minutes.


You can melt dark chocolate in a bain-marie, or if you are worried about finding natural chocolate, you can grind carob and use its powder instead of cocoa or chocolate.


While applying this chocolate mask, do not forget about your décolleté. You can also apply it to your whole body by increasing the amount of ingredients. This natural skin care mask, which you can apply every 15 days, will repair and refresh your skin.


Cocoa is also used for skin cracks. Vitamins A and E in it nourish and soften your skin. When you examine the ingredients of many creams, you will see cocoa butter. Cocoa has the ability to give moisture in a short time, especially to the skin that is worn out and dehydrated due to the sun or various reasons.


Secrets that will impress you to ease the pain of removing excess hair

Excess hair removal is a problem that all women suffer from, because of the pain that accompanies it, but today we are in the Woman Magazine, we will show you secrets that you follow to significantly reduce the pain of hair removal.


First: Never do hair removal in the morning, as the level of pain is at its highest


Before determining the time of hair removal, take advantage of our notes:


1. Take an aspirin 45 minutes before your appointment


This is a great strategy for reducing pain, not only because it works as well as over-the-counter pain relievers like aspirin, but because it has anti-inflammatory properties.


2. Do not set a date for hair removal immediately after the menstrual cycle.


During your period your skin will be more sensitive, so try to schedule the appointment at least three days before your period. And do not think about it during the days of the cycle, because the pain will be at its highest level.


3. Avoid wearing tight clothes or exercising.


Nothing can cause pain like the appearance of pimples in places that have been exposed to hair removal. Therefore, extreme caution must be taken during the 48 hours after hair removal, because the skin will be in the most sensitive state, and any tight clothing can increase sweating and bacteria, and thus pimples and infections. Tight clothes such as tight pants can also cause hair to enter the skin and grow in reverse.


4. Beware of pollution


We do not say that you will go to use public bathrooms, but immediately after the hair removal process, it is preferable that you do not use any public bathrooms or seats. Because the chances of inflammation Ultra .


5. Set the time for hair removal between 3-5 pm


The level of pain is at its highest in the morning

Hibiscus face mask

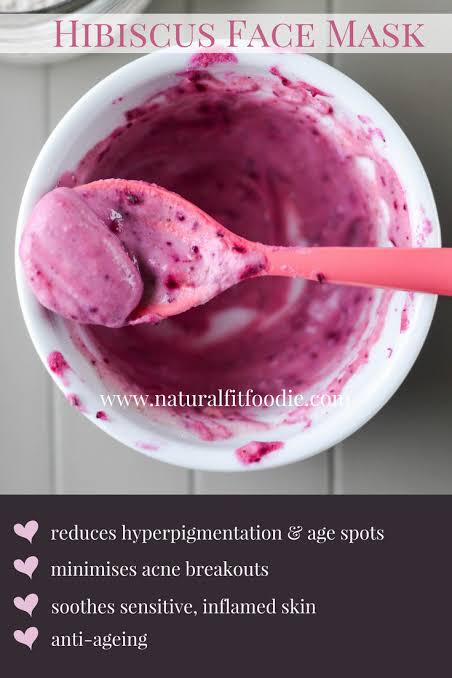
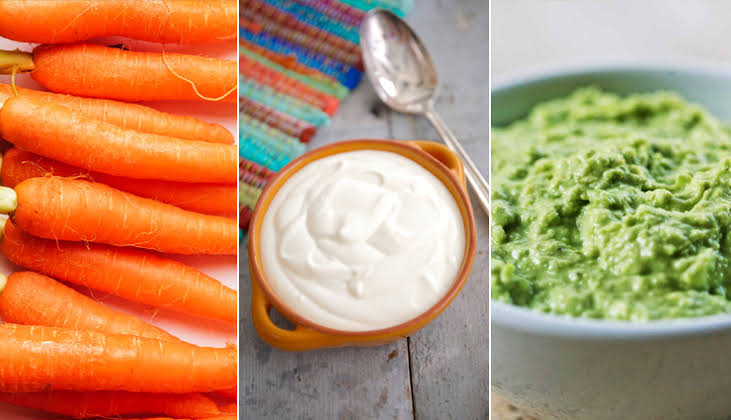
This mask is very useful for dry skin and the skin in general, as it works on its radiance and smoothness. Follow us to learn more about the mask and share your opinion with us …


Ingredients:


1 teaspoon hibiscus


1 tablespoon of honey


plain oatmeal


Method:


The hibiscus is placed with a quarter cup of boiling water for 30-40 minutes, then honey is mixed with it, after that we add oats to it to turn it into a paste, then it is placed on the face and neck for 10-15 minutes, then rinse with lukewarm water first, then with cold water

For a successful foundation

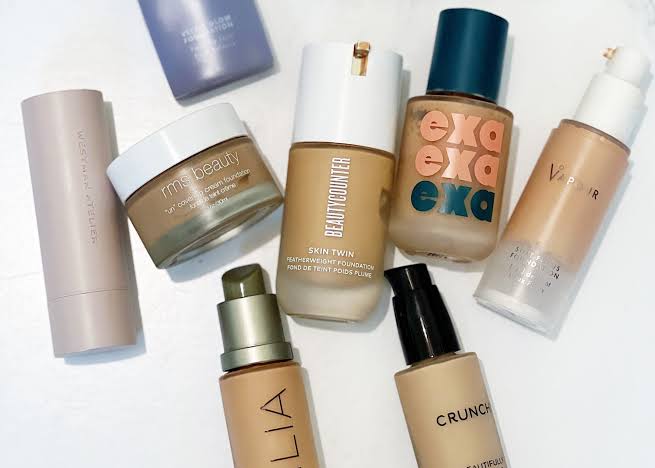
Madam, here are some tips and experiences that must be matched when buying foundation cream. Follow the details with us and share your opinion …


1. Try the foundation on under the cheekbone to match the color before you buy it.


2. Choose a foundation that completely melts into the skin without weighing it down.


3. Choose a color that is very close to your skin color, and do not try to whiten or darken your skin color with foundation cream, because its mission is to cover imperfections and not change the skin color.


4. If you have pale white skin, choose a pink foundation. And if you have dull skin, choose apricot colors. But if you are a dark brunette, choose orange colors.


5. To hide wrinkles, avoid foundation in dark colors that accentuate broad lines.


6. To cover dark spots, use a corrective cream before foundation.


7. If you suffer from red spots, use a green corrector that neutralizes the red color.


8. There is no need to set the foundation cream with a little powder, because the faded formulas are designed in a way that does not need powder.


9. Finally, try on the appropriate color and leave it on your skin for a few minutes. Do not try it on your hand, but rather on your jaw. Do not rely on store lighting, as you can go out into the natural light near the window to check the color before buying it, as this helps very much.

Carrot and avocado mask for dry skin

This great mask for dry skin contains just a few of our most popular ingredients. Among the components of this mask are antioxidants, which greatly help in combating aging. Carrots are also rich in potassium, which prevents skin dryness and has anti-inflammatory properties, which helps revitalize the skin. Follow with us the steps of this mask in order to enjoy fresh skin free of any dryness.


* Ingredients:

– 1 peeled and mashed carrot.


– 1/2 of an avocado.


– 1 tablespoon of honey.


– 1/2 tablespoon of olive oil (ie

Oil can do the show (except vegetable oil or coconut oil)


– 1 teaspoon of lemon juice.


– 1 egg yolk


* How to prepare :


– Flatten the carrot by steaming or boiling so that it is easy to mash.


Mash the carrot with a fork until it becomes creamy, or put the carrot in a blender until it forms a paste.


Mash the avocado with carrot pulp.

Note: The avocado must be well ripe


Hard to mash with a fork. In this case, I recommend putting unripe avocados with

Carrot in the blender until it is blended.


Then add honey, lemon juice and egg yolk and mix these ingredients well by hand.


Then spread the mask on a clean face for 15 minutes.


During the waiting period, you can mash the remaining half of the avocado with lemon and sea salt and enjoy it as a snack while you are waiting for the mask to finish.


Finally, wash your face from the mask with a warm cloth and remove the dry skin with it, then apply the moisturizer.

How to prepare skin lightening serums at home

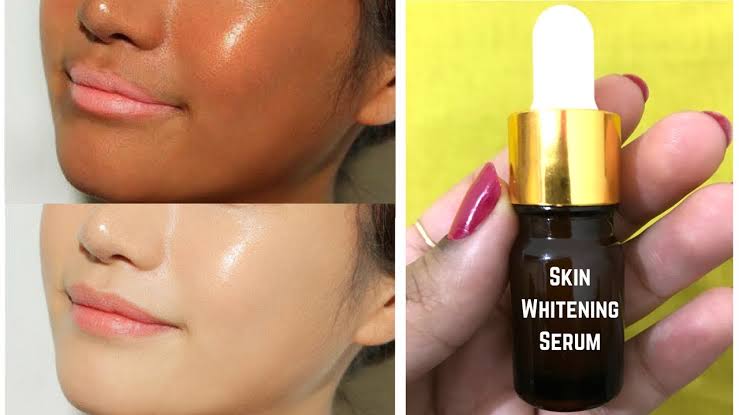
Today, we will tell you how to prepare skin-lightening serums at home, with simple ingredients that contain very useful elements and to treat various impurities in them. By the way, get acquainted with the vitamin C serum for the skin.


Preparing skin-lightening serums at home is one of the great options that help unify its color and give it freshness and radiance, provided that it is prepared from natural ingredients that are gentle on the skin. We will tell you about the methods of preparation, the most prominent of which are the following.


Lemon and honey serum


The lemon and honey serum provides many benefits, especially as it penetrates deep into the pores and gives them the nourishment they need. To prepare it, follow these steps:


Image Source Freepik, Mix 1 teaspoon of freshly squeezed lemon juice with 1 teaspoon of pure honey. Apply the mixture on the face and leave it for 15-20 minutes. Rinse the skin with lukewarm water and pat it dry gently. Apply this serum twice a week for better results. Aloe Vera and Rosemary Serum Mix 1 teaspoon A small amount of natural aloe vera gel with a few drops of rosemary oil. Apply the mixture to the skin and massage it gently for 5 minutes. Leave it to dry completely, then rinse your face with warm water. This serum can be used daily to get a bright skin.Green tea and rose oil serum


This serum cleanses the skin and removes impurities that spoil your look. So, follow these steps:


Boil a cup of water and add two tablespoons of green tea leaves. Let the tea brew for a few minutes, then strain and let it cool. Add a few drops of pure rose oil to the green tea. Use a cotton pad to spread the serum on the face and leave it to dry. Apply this serum twice a day.


This group of mixtures will provide you with benefits that will restore your skin’s glow