Best natural shower gel for dry skin

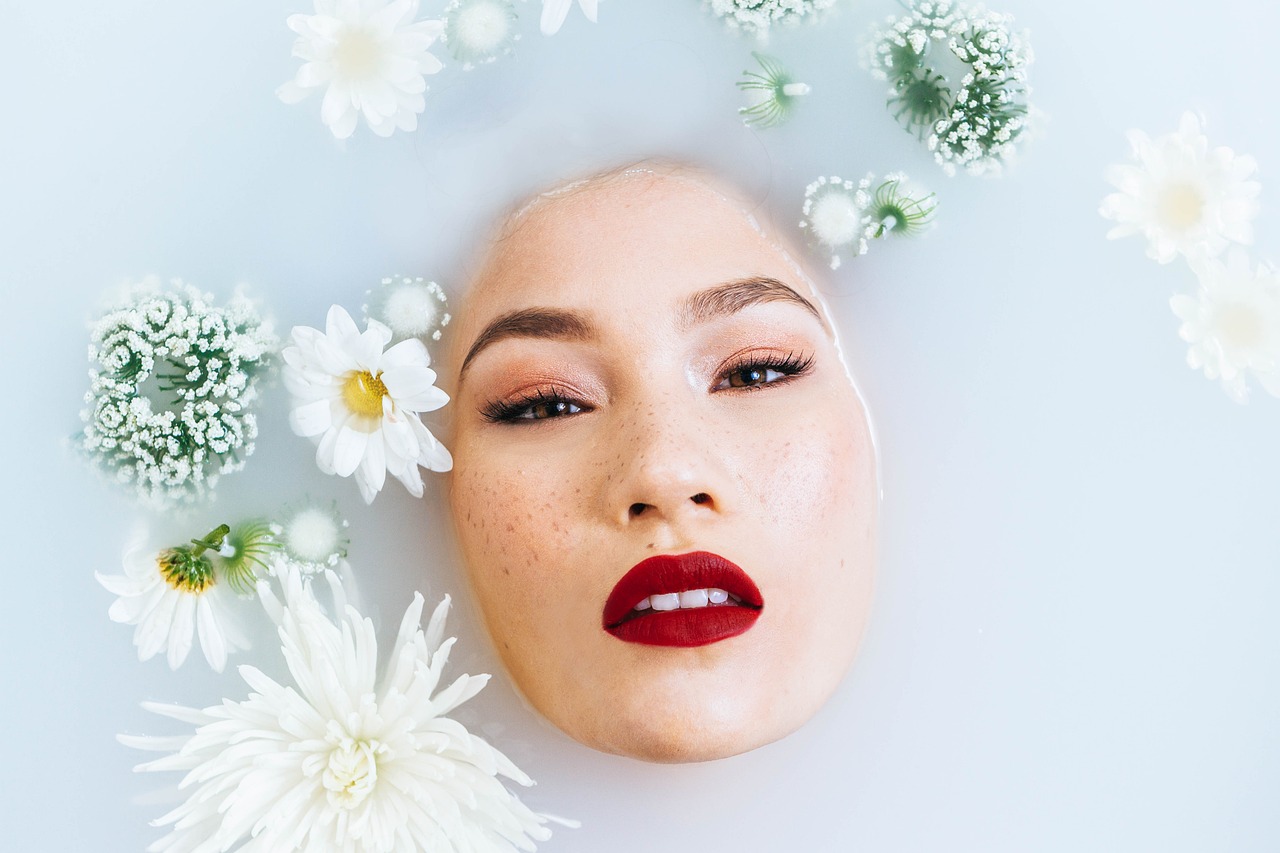
How to choose the best shower gel for dry skin There are many reasons for dry skin starting from wrong daily bathing habits such as daily hot showers and winter weather. In addition to the lack of natural oils in the skin, today we show you how to make a shower gel for dry skin, the best natural type. The good news for you today is that you do not need to go to a dermatologist to treat the problem of dry skin, instead rely on natural remedies that help you treat the problem and include it in your daily routine. Because dry skin problems are common to many people, the article will offer you a lot of benefits.

What is shower gel?

The shower gel is a suitable liquid for your skin type and is supposed to be applied while taking a shower while the skin is wet. The idea here is that the lotion helps you control the moisture content and lock it inside the skin. Instead of using a traditional bath lotion, you can prepare a lotion yourself at home.

The best natural type of shower gel for dry skin:

Ingredients:

  • 1/2 cup of shea butter.
  • 1 tablespoon of beeswax.
  • 3 tablespoons of coconut oil.
  • 2 tablespoons of jojoba oil.
  • 2 tablespoons of aloe vera gel.
  • 5-10 drops of lavender essential oil.

Steps:

First, add the shea butter, beeswax paste, and coconut oil to a metal or glass mixing bowl. And then put the bowl over a low temperature on the stove with stirring, in order to be able to melt all the ingredients in the bowl until it completely melts and mixes, you can leave the bowl on the side for 30 minutes until it cools down and freezes a little.

When the mixture begins to thicken, you can use a hand mixer to beat the mixture for a minute or two or even once the color becomes a little light, besides, use a hand mixer better than a spoon to allow the air to enter the mixture, and thus you get a texture that has a texture Whipped easy to apply.

Next, add jojoba oil, aloe vera gel, and lavender essential oil. At this stage, it is preferable to use a hand mixer until the mixture reaches the desired consistency and is easy to use.

Finally, you can put the lotion in a suitable container of glass or plastic with a capacity of 4 ounces, and to increase the effectiveness of applying the lotion, you can put a plastic bag with a zipper and then put it directly in the container.

How to use home bath lotion?

You can do your normal shower routine, and once you clean your body of course, you can put the lotion on wet skin and leave it for a minute or two, so that the skin absorbs it easily and achieve the necessary benefits for you, then quickly rinse again, we advise you to put the lotion on wet skin to double the benefits that you will get on her.

How does a shower gel for dry skin help soothe dry skin?

The skin naturally produces oil called sebum, which helps protect the skin from losing its natural moisture, but there are some daily habits that result in the loss of natural skin moisture, for example, forgetting to apply moisturizer or washing hands with dry soap. All of these factors make you lose Natural moisture and when using a home bath lotion, you can restore the luster of the skin and form a natural barrier, but if you suffer from acne, you can add tea tree oil, which is characterized by its anti-bacterial properties, to the mixture, thus it acts as an anti-bacterial that causes acne. We advise you in some cases of acne in Consult a dermatologist.

In addition, there are many ways to help you take advantage of natural oils in making skin lotion, either using it alone or combining it with a group of other elements, and among these effective elements in preparing the skin lotion, such as:

Coconut Oil:  Research has proven that coconut oil helps treat a range of different skin diseases, for example, allergies, eczema, allergies and dermatitis. Once the topical application of coconut oil, you can treat this problem.

Aloe vera gel: Aloe vera  gel is one of the plants that has natural healing properties and helps you produce natural oils. Therefore, we advise you to use it as a moisturizer for dry skin, because it contains many elements that work to lock moisture in the body.


Natural remedies suitable for dry skin:

There are a group of simple methods that help you improve and treat dry skin and get smooth skin.

1– olive oil:

Olive oil for dry skin is a wonderful natural oil as it acts as a natural cleanser, in addition, olive oil acts as a moisturizer at the same time. Once you apply olive oil to a cotton pad and rub the oil on the skin, then put a warm wet cloth on the face until it cools, then wipe the excess oil, olive oil helps you clean the skin and moisturize the skin 

2Make a creamy avocado mask:

You can prepare an avocado mask at home in a natural way and to soothe dry skin first, use half an avocado and then mix it with a small spoonful of olive oil and add a large spoonful of honey, if you have very dry skin, then apply the mask on the face and leave it for 15 – 20 minutes before washing the face, your skin should feel moisturized after applying the mask and at the end you can apply the usual moisturizing cream.

3Making a natural olive oil and sugar scrub:

You can easily make a natural scrub at home by mixing olive oil with sugar. First, mix ½ cup of sugar with 2 tablespoons of olive oil. And then add lavender oil, which adds a wonderful aroma and increases relaxation. You can use the scrub and rub gently on the skin, then wash and finally use a moisturizer to maintain the benefits of moisturizing the skin.

4Preparing an oatmeal soak to soothe the skin:

Adding half a cup of oatmeal  to warm bath water can naturally moisturize dry skin because oats soothe the skin. In addition, oatmeal helps your skin retain moisture after bathing. In addition, oats act as a great exfoliator for the skin.

  • First, mix 2 tablespoons of oatmeal with a tablespoon of honey and a little water. In addition, you may need to heat the mixture to get a liquid mixture and then rub the face with the mixture. You can use it only to exfoliate and wash it immediately or leave it on the skin for 15-20 minutes to act as a soothing and moisturizing mask for the skin.

5Applying coconut oil before bed:

Coconut oil can freeze at room temperature. Therefore, we recommend that you use it as a moisturizing cream for the skin before bed, in order to have effects on the skin at night. If you suffer from cracked heels and hands, you can apply the oil and then thick socks or non-latex gloves.


6Adding your favorite essential oil while taking a shower:

Natural oils are a great way to moisturize the skin and help you form a natural barrier to prevent the loss of natural oils in the skin. Which is often damaged by washing hands with commercial soap that strips the face of the natural oils present. So you can choose natural oils that help prevent skin irritation. You can choose a group of other natural oils such as jojoba oil, argan oil, and avocado oil. When using, we recommend placing a few tablespoons of any of the above oils in bath water and soaking in the water for a period of time ranging between 10-15 minutes. Then apply an amount of oil on the body after showering to maintain moisture and softness.

7Milk compresses for irritated skin:

Milk has natural anti-inflammatory properties because it contains lactic acid, which acts as a natural exfoliator for the body and for making milk compresses. You can soak a cotton cloth and pat it on the areas that are experiencing dryness. For this, we recommend leaving the compresses for 10 minutes each time in order to get rid of irritation and dryness of the skin.

8Natural fruit peels:

Natural fruit peels contain enzymes that help you get rid of dry skin. It also contains active ingredients such as alpha hydroxy acids and exfoliation of the dead layer on the face and body. We recommend using fruit peels as a mask twice a week and from natural fruits that contain enzymes such as pineapple, pumpkin and papaya.

9Applying aloe vera to irritated skin:

Although many people believe that aloe vera gel is used to relieve sunburn and is very useful during the winter, it also works to relieve irritated skin inflammation. It offers additional benefits such as reducing signs of aging, treating acne and can help people with Atopic Dermatitis.

10– Honey:

Several studies have found that honey possesses a range of skin moisturizing properties. Soothing burns, anti-inflammatory, these properties make it a great ingredient for dry skin and you can apply it directly to the skin.

11Vaseline:

Vaseline has been used for years as a natural skin moisturizer. In addition, it contains a group of mineral oils that are beneficial to the skin and form a natural barrier. To prevent the skin from losing its natural oils with exposure to external factors.

12Milk intake:

It can be a traditional advice, but taking milk helps in improving the appearance of dry skin easily. Research from 2015 suggests that a diet rich in milk helps improve dry skin. The study found that the fats in milk improve the skin and compensate for the natural oils that it loses.

13Sunflower seed oil:

A 2013 study Sunflower seed oil improves skin hydration, creating a protective barrier for the skin to prevent the loss of natural oils and sebum.


Expert tips for dry skin care:

There are a number of steps that help you provide the necessary care for dry skin, for example:

  1. Regular application of moisturizer : You should include moisturizer as an essential part of your daily skin care routine, and after that, you can apply moisturizer to your skin from head to toe.
  2. Following correct bathing habits : It is intended to avoid excessive use of warm water while showering, and to limit the duration of bathing to only 10 minutes, and in the case of using warm water and not to use too much commercial soap that strips the skin of natural oils.
  3. Avoid exposure to chemicals :   because chemicals can exacerbate dry skin problems, increase irritation, and cause burns in some cases.
  4. Eat more water: Taking care to drink enough water throughout the day helps prevent skin dehydration, as you moisturize the body from the inside and outside.
  5. Wear clothes that are suitable for the weather:   You can choose the appropriate sunscreen to apply while going out in the summer, and wear clothes that do not cause any skin irritation
Colored moisturizing cream recipes

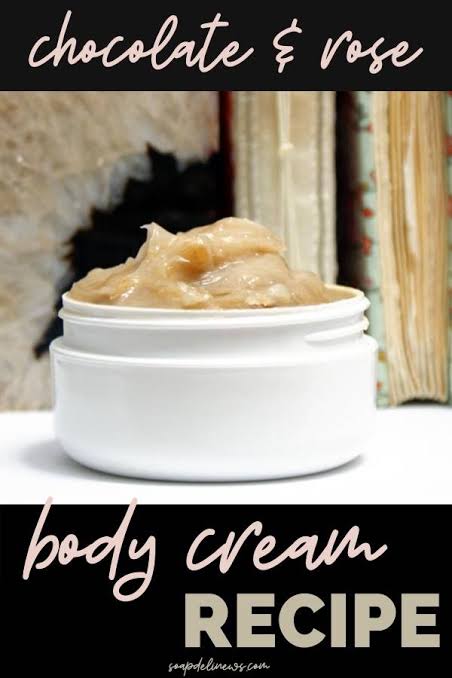
Have you ever wondered what is the difference between a tinted moisturizer that you buy in supermarkets and its homemade moisturizer? Well, the tinted moisturizer is less harmful to your skin for your skin and of course less heavy on your wallet when buying and being an option loaded with natural ingredients, it provides you with countless properties. Let us discover together the most important natural recipes for preparing the moisturizing cream yourself at home. Moisturizing the skin is essential because cracked skin is harmful to your skin and needs adequate care. Therefore, many specialists recommend using natural and cold colored moisturizing creams, as they are amazing because they contain natural elements. These moisturizers will help you get bright and tight skin away from chemical products harmful to the skin. In these cases, colored moisturizing creams help you get a renewed skin. These recipes for colored moisturizing cream are incredibly wonderful and give a wonderful look to the face, they are very ideal and have a dazzling effect.

Moisturizing cream work

Initial description:

This is the basic recipe for making tinted moisturizing cream at home, however you need your favorite foundation cream to prepare this cream. Your favorite foundation powder has already shown good results when preparing the moisturizing cream to achieve the previous functions. Once you try, you will get good results because the base cream is the base of the moisturizing cream.

  • 2 teaspoons of your favorite powder foundation.
  • 4 tablespoons of coconut oil.
  • 2 capsules of vitamin E.
  • 20 drops of lavender essential oil.

Steps:

  • Pour the coconut oil into a medium-sized bowl, and if it is in solid form, leave it to melt using a double pan or microwave. Once it cools, you can use it.
  • Add foundation powder to the bowl and mix with adjusting the amounts of foundation powder depending on the desired shade. If you want a lighter tinted moisturizer, use a moderate amount of foundation powder, and for a darker shade, increase the amount you add.
  • Pour the vitamin E content into the bowl and mix well. It can be replaced with 10-20 drops of other nourishing oils such as sweet almond oil, jojoba oil.
  • Pour lavender essential oil into the mixture if you have oily skin prone to acne breakouts, and if you have normal and normal skin, avoid using lavender essential oil.
  • Mix all ingredients together well, using a spoon or your hands, and keep the bowl on one side until the mixture reaches room temperature.
  •  On the other hand, you need to mix the ingredients well together to help you get a consistent and uninterrupted mixture. Tinted moisturizing cream can become a little thinner when adding a few drops of nourishing oil and pouring the mixture into an empty container.

Second description:

If you want to get a base cream recipe that gives great results, you can try this perfect recipe and have a beautiful natural color. So that you enjoy the glow of the skin in addition to a deep look. However, the best part about this recipe is the ingredients it contains like raw shea butter, extra virgin coconut oil to get soft and supple skin. Almond oil and vitamin E fight the signs of aging, aloe vera gel rejuvenates damaged cells, lemon essential oil eliminates toxins and tightens the skin, in addition to bentotite clay, it achieves deep cleansing by using cocoa powder as a base and giving a light color to the cream.

Ingredients :

  • 1 teaspoon of beeswax.
  • 1 teaspoon shea butter.
  • 4 tablespoons of almond oil.
  • 2 teaspoons of extra virgin coconut oil.
  • 2 teaspoons of pure honey.
  • 2 teaspoons of vitamin E.
  • 6 tablespoons of aloe vera gel.
  • A small spoon of bentonite clay.
  • A small spoonful of cocoa powder.
  • 20 drops lemon essential oil.

Steps:

  • Pour beeswax, shea butter, coconut oil, almond oil into a double boiler and heat slowly until all ingredients are combined together and melted, leave the mixture to cool and transfer to a blender.
  • Take a small mixing bowl, put aloe vera gel, and pour pure honey, vitamin E oil, and lemon essential oil into a bowl, and whisk between them well until you get a smooth mixture.
  •  Now, pour the mixture over the pure aloe vera and honey mixture in the beeswax and shea butter mixture while keeping the mixture in the bowl of the electric mixer and mixing well until you get the consistency of the mixture needed for use and the beeswax mixture becomes like a lip balm-like substance and is gently broken with a small spoon and continue to blending.
  • Once the ingredients are combined together, you can transfer the mixture to a high-quality bottle or high-quality plastic container. At this point, you add bentonite clay and try to choose a metal container that is safe enough and add cocoa powder to it as well. You can increase the cocoa powder to control the shade of the home humidifier and to get a darker degree You can increase the amount of cocoa used and vice versa. Finally, store the freshly colored moisturizer in a plastic container to place in a cool, dry area.

Cocoa Powder, Coconut Oil, and Beeswax:

If you want to have a cold cream that offers you deep hydration and nourishment to your skin, then it is a great option that you can look at to get the desired glow. This cream is amazing and offers you flawless skin and you will not fail to enjoy a great complexion. Mixing these ingredients creates a tinted moisturizing cream that does wonders for the skin.

Green tea and moisturizing cream:

If you want to get a refreshing moisturizing cream, you can try green tea cream because it enhances the radiance of your skin. Because green tea is one of the amazing antioxidant creams and natural products that tighten the skin, it is a natural moisturizer for the skin when you add green tea to your homemade moisturizing cream.

Other recipes to make moisturizing cream at home:

Coconut oil : 

Coconut oil offers skin soothing properties. You can apply it once a week until the skin absorbs it and with regular application you will notice that the skin has become smoother and softer. It is preferable when washing coconut oil to use lukewarm water, not hot, because hot water absorbs moisture from the skin

Banana and coconut oil mixture:

Bananas provide instant relief to get rid of dry skin because it has moisturizing properties. Coconut also contains a high percentage of fat that helps the skin to restore its freshness.

Mash the banana with the back of the hanging, then mix it with coconut oil, then apply the mask on the face and leave it for 20 minutes. It is preferable to apply this mask once or twice a week.

Milk Butter : 

Milk butter contains a lot of nutrients that act as a perfect moisturizer for the face. Also, the skin absorbs buttermilk easily and helps you get soft skin. And avoid the appearance of wrinkles.

Sesame oil : 

Dry and itchy skin needs deep hydration, so sesame oil can give you the desired effect and get shiny skin. You may not need to mix sesame oil with other ingredients. Just applying sesame oil to the skin and leaving it for 5-10 minutes will help you get silky smooth skin.

cold milk : 

When applying cold milk and massaging gently, it is an effective method for all skin types. Where the pores of the skin absorb milk easily and achieve more hydration.

Yogurt and honey :

Dry skin is very sensitive, the best way for it is regular exfoliation and moisturizing to get rid of dead cells without harming the skin. Yogurt contains lactic acid that works to get rid of dry skin.

Glycerol:

Glycerin is a powerful natural moisturizer that provides a watery layer to the skin and also nourishes the skin. You can mix glycerin with rose water to get a wonderful natural ingredient.

Mix glycerin with double amounts of water together to make a solution and apply it at night until a wonderful effect on your skin

make your own anti-wrinkle cream

Anti-aging creams are a basic need for modern women who are eager to enjoy youthful, wrinkle-free skin.
However, it is expensive and may backfire because it contains synthetic materials.
On the other hand, you can make your own anti-wrinkle cream from home products.

Anti-wrinkle cream

Ingredients:
You need 4 tablespoons of milk,
2 teaspoons honey, 10
spoons of moisturizing cream, one egg yolk,
10 drops of sweet almond oil.

Method of preparation and use:
Heat the honey until it warms up, and mix it with the milk in a bowl, and then add the moisturizing cream, egg yolk and sweet almond oil.
The mixture is mixed well for three minutes, then packed in a dark bottle and kept in the fridge for daily evening use.
Leave the mask on the face for a quarter of an hour.

Use this mask two or three times a week.
And keep the cream made for a month only, then re-install it again.

And remember to drink 8 glasses of water daily.
Divide your table with vegetables, especially cucumbers, lettuce and carrots, which give your skin freshness and vitality.
And drink lemon juice for its richness in anti-wrinkle antioxidants.

Try this wonderful cream, and flaunt the youth and vitality of your skin at all times.

Homemade cream to get rid of cellulite

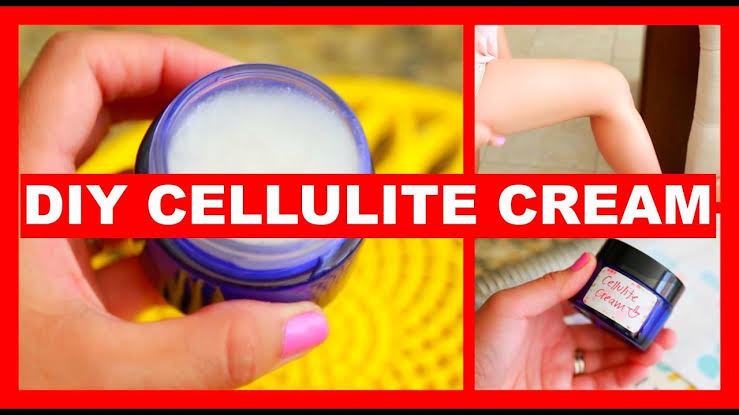
Many women suffer from the problem of cellulite, which is difficult to solve, so today we present to you a way to prepare a natural home cream that eliminates this problem. Learn about its components and how to apply it with us and prepare it yourself and make sure to use it constantly, according to the “Your Beauty” website.
Ingredients: 
cup of raw cocoa butter.
A cup of Vaseline.
Two tablespoons of
half a cup of almond oil.
Half a cup of coconut oil.
Two tablespoons of olive oil.
Content of 5 capsules of vitamin E (in case it is not available, 3 tablespoons of sunflower oil can be used).
Method of preparation
– Add cocoa butter to Vaseline, and put the mixture in a hot water bath (or in the electric oven for 10 seconds) with stirring until completely melted.
– Add almond oil, coconut oil and olive oil to the mixture, then add vitamin E and coffee to the mixture.
– Stir the ingredients, and store in a clean jar in the refrigerator until use.
How to use
– It is preferable to shower with warm water before applying the cream to open the pores.
– The skin is dried well, and the cream is placed on the affected areas with a massage for 10 minutes in a circular motion until the cream is completely absorbed by the skin. Use the cream twice a day and the cellulite will gradually disappear

Benefits of shea butter for hair

The benefits of shea butter for hair are no less than the benefits of shea butter on the skin. Shea butter is one of the most important natural ingredients that can be used on the hair, as it provides the hair with the nutrients it needs, as it moisturizes the hair and prevents the appearance of signs of graying and many more benefits The other that we will show you in this article is about the benefits of shea butter on hair.

The use of shea butter dates back to the era of Cleopatra when she carried a jar of shea butter with her anywhere she went and was used as a cosmetics or body lotion for thousands of years now. Shea butter was one of the most important commercially sold refreshments in the Middle Ages and then its popularity spread throughout West Africa and its coastal areas.

Benefits of shea butter for hair

We will explain to you the most important benefits of shea butter on the hair and ways to use it on the hair.

1- Shea butter helps repair damaged hair:

Chemical preparations, straighteners and hair curlers are primarily responsible for removing the natural moisture from the hair. Shea butter can help restore this lost moisture from the hair. It also protects the hair from the harsh weather conditions it is exposed to, as well as protecting it from free radicals that are found in the air and water. Shea Butter has an SPF that is low enough to protect the hair from sun damage caused by exposure to ultraviolet rays. Hair from heat tools or any harmful substance that is passed along the hair as it is effective in treating treated hair and dyed hair. Shea butter also protects hair against salt and chlorine when applied to the hair before swimming.

Here are some simple ways to introduce shea butter into your hair care regimen:

  • Take 1 tablespoon of raw shea butter or unrefined, unprocessed shea butter and melt it in the microwave for 30 to 60 seconds.
  • Once the butter has cooled a bit, add a few drops of lavender essential oil. This step is not necessary.
  • Divide your hair into small sections and then apply the liquid butter to your scalp and the entire length of your hair
  • Leave it on the hair and scalp for half an hour and then rinse your hair with a gentle shampoo on the hair and scalp.

2. Shea Butter Prevents Hair Loss:

The fatty acids in shea butter protect the scalp and hair and provide them with a number of essential nutrients that improve both the scalp and hair health. This will make your hair stronger and reduce the chances of hair loss and hair loss. Shea butter also contains natural properties. An anti-inflammatory that helps treat infections in the scalp and thus reduce the chances of hair loss and thus your hair will grow more intense and have a natural luster when you use Shea Butter regularly.

3. Shea Butter Helps Soothe a Dry and Itchy Scalp:

Shea butter is effective in relieving dry and itchy scalp and helps prevent and treat dandruff, as it contains natural anti-inflammatory properties. Moisturizing dry scalp, psoriasis and other common scalp conditions.

To get rid of and treat dandruff of the scalp using shea butter, you can apply the following steps:

  • Take a piece of shea butter in one hand.
  • After the shea butter melts, use the fingers of the other hand to massage the shea butter little by little into your scalp.
  • To eliminate the dandruff of the scalp as soon as possible, apply this method from two to three times a week regularly
  • Read more about https://carebeautyco.com/keep-your-skin-fresh-with-this-cream/

4- Shea butter treats split ends of hair:

Shea butter has moisturizing and regenerative properties on the hair and scalp, and this strengthens the hair strands and reduces breakage. It is also rich in vitamins A and E that work to calm dry hair and repair damaged and split ends of the hair.

To repair damaged and brittle hair using shea butter, you can apply the following steps:

  • Mix shea butter with any type of carrier oil such as virgin olive oil or virgin coconut oil.
  • Put the mixture of oils and shea butter on the tufts of hair.
  • Leave the mask on the hair for at least 30 minutes.
  • Wash your hair with a nourishing shampoo for brittle and damaged hair.
  • For best results, repeat this method twice a week regularly.

5- Shea Butter is a natural hair conditioner and conditioner.

Shea butter contains large amounts of vitamins A and E, which makes it an excellent choice for moisturizing hair from the roots to the ends. It can be used as a natural hair conditioner as it is effective in retaining moisture in the hair without leaving the hair greasy.

6. Shea Butter Helps Straighten Curly Hair:

Shea butter works to soften fragile hair, and due to its natural non-greasy nature, it helps to control excess oil in the scalp. Massaging the hair with large quantities of shea butter can give you soft and silky hair. Shea butter must be applied twice a week for hair growth and this will improve the texture of the hair. Hair and helps moisturize hair, so shea butter can be used on a large scale in curly hair care products.

To smooth curly hair using shea butter, you can follow these steps:

  • Rub a teaspoon of shea butter between the palms of your hands.
  • When the shea butter melts, pass your hands between your hair strands.
  • Comb the hair with the brush until you make sure that you cover each strand of your hair with shea butter.

7- Shea butter protects the hair from the effects of the heat of the hair iron and hair dryer:

Constant exposure of hair to heat leads to hair damage and bombing, and hair loses its vitality, so we advise you if you are those who are constantly straightening their hair with a hair iron or hair dryer regularly, use a small amount of shea butter to protect your hair and its strands from the damage of exposure to heat.

To protect your hair from exposure to heat by using shea butter, you can follow the following steps:

  • You can use shea butter directly on the hair, or. you can add grapeseed oil or avocado oil to it, as both oils have a high burning point.
  • Apply the mixture to small areas of hair while drying or straightening the hair.