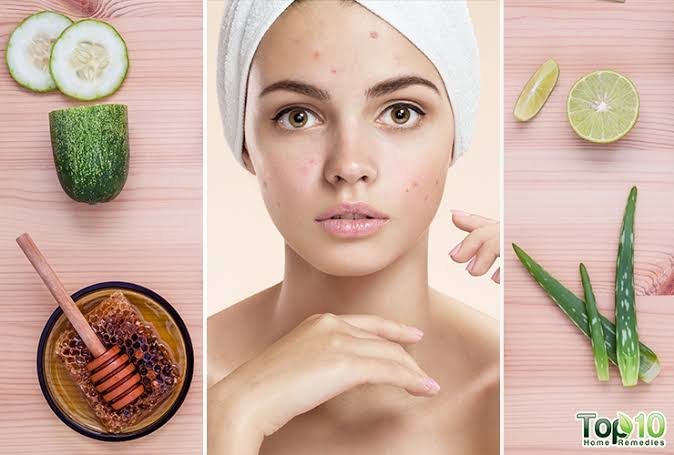
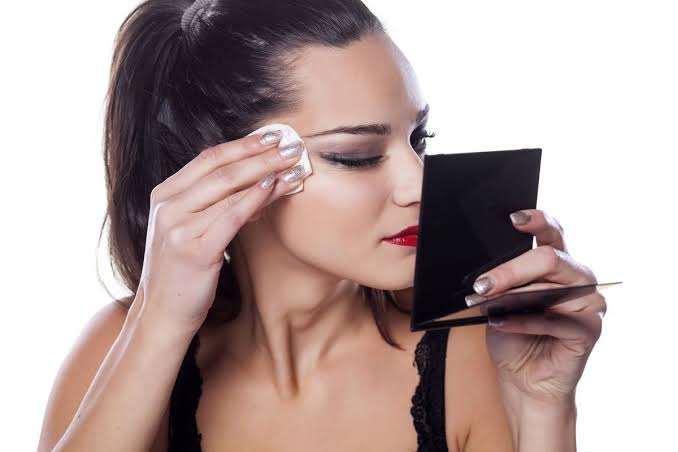
That’s why you have to remove makeup before going to bed!

It is a golden rule that is repeated and repeated by all professionals. Sleeping without removing makeup is very bad for the skin, we know that! But why exactly?
The surest way to age well? Good genes and… good makeup removal. It would be THE youthful gesture that beats all the others. What if we really tie in with each other?
Here are some excuses that we hear too often: “What’s the point, I don’t wear makeup!” “; “In the evening, I’m so tired that I fall asleep on my sofa, so the make-up removal…”
A gloomy inventory because many women do not know how to remove makeup. There are those who do not do it well or do not do it at the right time (in the evening, imperatively), those who do not use the right products, those who have forgotten how to do it…. In short, before spending the equivalent of a Louis Vuitton bag on anti-aging potions, it’s time to review your classics.

WHY DOES “CLEAN” SKIN AGE LESS QUICKLY?

Because it is less prone to micro-inflammations, a phenomenon today pointed out by scientists as the main cause of aging. Fats and pollutants generate oxidation and inflammation. In addition, they alter the barrier function of the skin, which becomes dehydrated, becomes sensitized and becomes even more vulnerable to attackers. A real vicious circle. If we forget to remove make-up once, it’s not a disaster, but if we systematically go to bed with congested skin, the complexion becomes dull and the face is marked faster.
The other advantage of makeup removal is the massage that accompanies it. It improves microcirculation, therefore cell nutrition and oxygenation. Just like a healthy and balanced diet, make-up removal is part of the daily reflexes that promote the youthfulness of the skin.

Why is it so important to remove makeup every night?
In reality, we should talk about makeup removal-cleansing, because even if we do not wear makeup (we see some coming!), Clearing the skin at night is essential. It is at night that the skin works on its repair, its regeneration and, for this, it must not be distracted by a layer of aggressors: the SPF of sun creams or very irritating day creams if they are not removed. ; ultra-polluting volatile metal particles that stick to the skin; the powders and pigments of make-up which hinder breathing … Hygiene is the basis of good health, it is through it that many problems are solved, and the skin is no exception to this rule.
Thoroughly cleaning your face of superficial impurities is therefore the number 1 gesture to avoid cellular dysfunctions. Like, for example, increased sensitivity; a feeling of drier skin than it naturally is; enlarged pores while the skin is not oily in nature. Make-up removal should be approached as a gesture of real and deep care.

WHY IS ONLY THE MILK + LOTION DUO APPROVED BY THE PROS?

Because the texture of milk is the best for emulsifying eyeshadows and / or impurities, without being abrasive or destabilizing the skin’s balance. The reason: the milk comes as close as possible to the film on the surface of the skin, made up of sebum and sweat. The ideal milk must also respect the pH of the weakly acidic skin, possess emollient, moisturizing and soothing active ingredients. In short, to have a formulation at the top level. According to the pros, you should invest as much money in a makeup remover as in an anti-aging cream. The lotion is used to remove fatty residues that persist on the skin after rinsing with water. To be perfectly effective, it must be chosen from the same line as milk, the two products having been designed to complement each other. No skin, even oily, escapes this regime:the milk detaches the scales, brings emollience, respects the hydrolipidic film, properties which also claim the skins with seborrheic tendency.

WHAT IS THE RIGHT GESTURE?

With your fingertips, gently massage your makeup remover onto well-dried skin (avoiding the eyes), for at least one minute. You must always go from the neck to the top of the face and from the nose to the ears so as not to traumatize the tissues. To be followed by a first rinsing with water. Then we start again with the milk. The first step serves to remove surface impurities, makeup; the second to dissolve deeper toxins. This is why the massage must be supported (which does not mean brutal). Re-rinse with water with hands or cotton.
Sponges and washcloths are usually too harsh and, if not washed every day, become breeding grounds for bacteria. The final step: the application of the cotton lotion; The large cottons indicated for the buttocks of babies are the softest on the market. How to know if the skin is clear: the last cotton used must be immaculate.

WHAT ARE THE QUICKLY VISIBLE BENEFITS?

From the first week, the skin regains radiance, the complexion is clearer and fresher. And this without changing anything in his skincare routine. Tempting, right? Another advantage, by removing make-up properly, which means by respecting the skin ecosystem and not by stripping the skin, we gain in comfort and we are less constrained to overfeed our skin with thick layers of cream or to invest in it. money in overpriced serums. It also makes cosmetics applied afterwards more effective. Clearly, investing in a good make-up removal also leads to savings on your skincare products.

WHAT TO THINK… FOAMING CLEANSERS WITH WATER? 

They are not at all suitable for the skin hydrolipidic film. The only exception: in summer, they are formidable for removing sunscreen that clings to the skin. But we always follow with milk and lotion, a three-step ritual, so Japanese.

MAKE-UP REMOVING OILS?   

They are only justified in case of super thick make-up, like studio make-up. In this case, the oil is used before the milk-lotion duo, but never alone. Formulas with vegetable oils are preferred rather than mineral (look for “paraffinum liquidum” on the labels), which risk clogging the pores.

MICELLAR WATERS?    

We love them, because they are super practical, but we will have to ease off and use them only occasionally. Too watery, too far from the quality of the skin, too detergent, micellar water does not fulfill the ideal functions of make-up remover. To reserve for the evenings of great laziness.

EXFOLIATING LOTIONS?  

Using a salicylic or glycolic acid tonic at the end of makeup removal is very popular in the United States. With us, it is considered too aggressive. Unless you have a prescription for your skin tone, you avoid it on a daily basis and only use it as a “radiance”

The secret to fighting acne is in your kitchen

Are you tired of unsightly enlarged pores and dreaming of clearer, more radiant skin? Good thing, a natural solution exists!

Generally, combination and oily skin are more predisposed to this type of inconvenience. These thicker skins produce more sebum, this fatty substance essential for the protection of the skin.

The problem is the excess sebum. It dilates the pores which feed on this excess fat. Result, impurities are lodged there and in contact with the air, the comedones oxidize and blacken to finally become what are called blackheads.

The causes can be various; hormonal upheaval, sun exposure, use of inappropriate products disrupting the pH of the skin …

But enlarged pores are far from inevitable. And good news, there is a natural remedy!

THE MASK WITH EGG WHITE AND LEMON JUICE

The miracle solution? An egg white mask mixed with lemon juice. And yes, it’s that easy!

Egg white is a great skin ally and its properties are numerous. Besides absorbing excess sebum, it contains a very important enzyme called lysozyme. The latter is a natural antibiotic for the skin and it attacks the bacteria responsible for the appearance of comedones. In addition, its concentration of natural emulsifiers promotes deep cleansing of the skin.

Lemon is also an essential ally in the fight against blackheads. Its antiseptic, energizing and purifying properties are ideal for eliminating them and accelerating the drying and healing of pimples.

In summary, the mask with egg white and lemon juice has only qualities. Natural, economical and easy to make, it will be your new beauty secret.

Ingredients :

  • 1 egg white
  • Lemon juice

Preperation :

Separate the white from the egg yolk. Beat the egg white until stiff and apply it immediately to the cleansed face. As soon as the mask is dry, rinse the face and apply lemon juice using a soaked cotton ball.

Warning :

Lemon being photosensitizing, you should not in any case expose yourself to the sun after its application.

In addition, it will be too aggressive for sensitive skin. Then replace it with rose water.

Of course, if the problem persists, consult your dermatologist.

The miraculous power of castor oil

Castor oil is known to have miraculous power on hair, eyelashes, eyebrows, and even the beard. The legendary Cleopatra already used it for its multiple virtues.

THE BENEFITS OF CASTOR OIL

Although no scientific studies have been conducted on this subject, people who apply castor oil to their hair are unanimous on its beneficial effects.

It limits hair loss, promotes regrowth, treats itching, nourishes dry, damaged, brittle hair and makes it softer and shinier.

Often abused, covered in mascara and poorly cleansed, eyelashes break, grow less quickly and become shorter.

Castor oil naturally contains vitamin E, essential amino acids and omega 6 fatty acids which will nourish your lashes, repair them and make them stronger.

Castor oil is also very effective in accelerating the growth of the beard, making it denser, softer and shinier.

WHAT TYPE OF HAIR SHOULD CASTOR OIL BE USED ON?

Castor oil is suitable for all hair types; thin or thick, dry or oily. Its benefits can benefit both women and men.

Moreover, men were the first to use castor oil, which allowed them to protect and smooth their hair before the invention of gel and other waxes.

HOW TO USE CASTOR OIL?

Castor oil is a very dense and viscous vegetable oil, which can complicate its application. This is why it is preferable to dilute it halfway with another more liquid oil, such as olive oil, coconut oil, almond oil, etc.

Start by massaging your scalp. This first step will allow the castor oil to penetrate and activate blood circulation. It is this stimulation of the microcirculation that will promote hair growth.

Then apply castor oil to the lengths of your hair and to the tips.

For best efficiency, let the oil sit at least 2 hours, the best is to apply it in the evening and keep it overnight.

Once the break time is respected, all you have to do is wash your hair thoroughly with your usual shampoo.

Even if the effect of castor oil can be visible from the first use, you can make a course of treatment over a month in order to obtain the desired result.

3 simple changes to lose pounds and get back in shape

Most of the men who have been confronted with weight gain have experienced this. That moment when you realize your health is deteriorating and you realize you need to do something.

Josh Ingraham didn’t see that moment come and yet in just a year he found himself drawn into a new life. His family grew, with his wife they welcomed a little girl. He accepted a new post of Executive Chef. With the hours spent at work and family life, he had to give up sports.

“For over a year, I didn’t take time for myself. I don’t think I’ve trained once, ”says Ingraham. “From there, everything got out of hand. I couldn’t sleep and was so busy that I wasn’t paying attention to what I was eating. I was going easy. “

He could feel the pounds piling up. Then. He received an email inviting him to participate in a 90-day fitness challenge. Workouts and nutritional advice were included, with a great top prize up for grabs. Being a former sportsman, Ingraham thought he could easily win, so he took his “before” photo, the one on the left below. With his 100 kg, he had a lot more work ahead than he originally thought.

I didn’t realize what I had become until I took this photo, ”says Ingraham. “I was devastated. He wasn’t the guy I thought I was. “

It was complicated to make time for exercise with his busy schedule, but that excuse was put aside and he started setting his alarm clock for 5 a.m. every day. Ingraham knew that if he slept he just wouldn’t have a workout and that one gap could easily ruin his challenge.

For 90 days, he worked hard, following the program religiously. He focused on strength training paired with 6 km runs five times a week. After three months, Ingraham did not win the challenge. He was both shocked and frustrated when he saw the guy who won, disappointed with his own results. So he signed up for another 90-day challenge, this time determined to improve his workouts.

Now Ingraham’s “daddy body” is a thing of the past – and he believes anyone can sculpt abs if they devote themselves to the following lifestyle changes:

  1. COMMIT TO RESPECTING A TRAINING SCHEDULE

After researching weight loss, Ingraham discovered that he was making a lot of mistakes. I exhausted myself by doing too many training sessions, I was not giving myself a break, ”he explains. For the next 90 days, I rested on Wednesdays and Saturdays. It helped me. The rest day even made me more surly the next day, I looked forward to my workouts. “

In addition to his days off, he traded in his long runs for high intensity interval training (HIIT) sessions. Every morning, Ingraham would start with exercises in his garage, ranging from dumbbells to strength training exercises like dips and pullups. Instead of performing a number of reps and sets, he worked each exercise until he could only do three to five reps in one movement. “I don’t count until it starts to hurt,” he explains.

He would then go to the stadium, set up two cones about ten meters apart, and do 10 to 20 minutes of HIIT about three times a week in addition to working with his dumbbells.

“I was doing back and forth sprinting between the cones, 30 seconds of walking, 30 seconds of stopping; all this for 10 minutes, ”says Ingraham. “I used to mix the exercises, like jumping instead of sprinting, but it never lasts longer than 20 minutes. “

As a father of two with a demanding job, he understood the importance of a fixed schedule. “For me, the only time I could train is early in the morning. I was losing an hour of sleep, but that’s how it is. I had to finish at 8am every day. This is where my daughter wakes up. I can’t tell him to go back to bed until I finish my training. “

2.LIMIT YOUR ALCOHOL CONSUMPTION

As he settled into a new exercise routine, his diet changed, so Ingraham began to pay more attention to what was on his plate. “I found that I was not eating healthy enough. I eliminated processed foods and carbohydrates. I stopped dairy products, he says.

He also gave up alcohol: “I have always liked alcohol. There was a time in my life when I even started to be interested in wine, and I thought about becoming a sommelier, “he said,” but I realized it was something I wanted to know. had to remove if I wanted to see the results I was hoping for ”.

Even though it’s difficult, “these are unnecessary calories. You can sacrifice a party or two, if you want to see physical changes appear, you have to be 100% committed, ”he explains.

After that, the small diet changes continued to take place. I realized that I could cut back and be full, ”he says.

3.COOKING AT HOME

Even if you are a chef, Ingraham believes that preparing your own meals allows you to be more aware of what you eat. In addition, it eliminates much of the temptation that is found on restaurant menus.

Scientific studies back it up: Researchers in the UK analyzed data from a survey of over 11,000 men and women and found that people who ate more than five home-cooked meals a week were 28% less likely to be overweight and 24% less likely to have excess body fat than people who ate less than three home-cooked meals per week.

Ingraham knew he was on the right track when he started seeing his abs and feeling fitter than ever.

It has been over 200 days since Ingraham started exercising again. Now he weighs 87 kg and he has no plans to quit anytime soon. “I actually feel like I can still improve my physique, so I don’t want to let go now,” he says.

What is your body type?

Here are some explanations and tips that will enlighten you on your body type.
First of all girls, know that your body type has nothing to do with your weight. Here we are only talking about the shape of the body!

WOMEN IN 8, A AND X9

The woman in 8 corresponds to the ideal feminine, marked waist and hips and shoulders of the same width.

The woman in A has a marked waist but her hips are wider than the shoulders.

The woman in X is very close to 8 but less plump, and it often characterizes very thin and lanky women.

For these 3 silhouettes, 8, A and X, you can wear patterns and horizontal stripes on the upper body. These will widen and balance the silhouette with the lower body. For the A, dare the shoulder pads and structured tops, while for the X, prefer rounded cuts.

THE WOMAN IN V

As for her, her shoulders are wider than her hips.

Here you have to rebalance your figure by expanding your pelvis. Pleated skirts, carrot pants and skater dresses are yours.

WOMEN IN H AND O

The woman in H has very little marked waist and hips and shoulders in the same alignment.

The woman O is her, all round.

The O or H silhouettes are perfect for wearing fitted jackets that will give the illusion of a marked waist. Be careful, however, for the H; do not wrap a slightly marked waist so as not to attract the eye!
Thus, the goal is to find what type of clothing enhances us the most according to our morphology, to make everyone believe that we have an 8 body shape … Smart!

SOME ADDITIONAL TIPS

Avoid excessive color contrasts between the upper and lower body (especially if you are an A woman) in order to harmonize everything.
For fans of all kinds of patterns, be careful: the bigger the print, the more it increases the volume! It’s up to you to find out how to wear it according to your body type!
There you go, you know everything! Now you can go shopping and fill your wardrobe even more!

8 simple tips for regrowing eyebrows

If you are in a period where your eyebrows are sparse because you were a little harsh with your tweezers you must definitely be looking for solutions to deal with it right? The eyebrows frame the face and having smooth brows can really make a difference in the look, so keep reading for some easy tips!

Put away your tweezers

The very first lesson in getting your brows back is to stop waxing for at least a month or two. This will allow your hair follicles to regain strength. It’s a lot to ask, but it’s best to take a break for a while and start over. If you can’t stand to see hair, you can pluck above your browbone and between your eyebrows, but nothing else!

Food supplements

Another effective way to regrow eyebrows is to take vitamins. Vitamins A, B6, C, C, E, and B8 help the body grow hair and nails. You can easily get these vitamins from foods like carrots, green leafy vegetables, fruits, nuts, and brown rice. You can also take two capsules of phytophanere each morning to make sure you are getting your dose of these vitamins and nutrients needed for new hair growth.

Hydrate yourself

Another important step in eyebrow regrowth is to make sure you are well hydrated by drinking plenty of water! Drinking water and staying hydrated is great for your skin as well and for your hair system, so drink it!

Go for massage

One of the little-known ways to regrow eyebrows is to massage them with a small amount of olive, coconut, or castor oil. Take a thin eyebrow brush and dip it in the oil of your choice and massage the oil in the direction your bristles grow and make it part of your daily routine. This technique helps improve the growth of your eyebrows while strengthening them.

Use an eyebrow pencil

The most commonly used and effortless method of regrowing eyebrows is to fill in the empty spaces using makeup. Whether you choose an eyebrow pencil or a blush, be sure to perform light strokes and avoid drawing a long line! If you are missing a lot of hair and need some advice on how to shape your eyebrows, try using an eyebrow stencil.

Consume protein

Another home remedy for eyebrow regrowth is to include protein in your diet. Your hair and body hair is made up mostly of protein, so it’s important to increase your protein intake while you’re trying to regrow your eyebrows. Too much caffeine, sugar, and fat can interfere with hair growth, so try to limit your intake of these foods.

Eggs

One of the most amazing ways to regrow eyebrows is to use egg yolk. Yes girls, you read that right! Take an egg and separate the white from the egg yolk and beat the egg yolk. Take a cotton swab soak it in egg yolk and apply it on your eyebrow for 10-15 minutes. You can also use milk and raw onion juice the same way to stimulate your hair follicles and regrow your eyebrows!

Obtain clinical results

Phytociane is used by many people to regrow hair, but did you know that it also plays a big role in eyebrow regrowth? Take a small spare toothbrush, a child’s size works best and soak it in and lightly brush the product onto one or two areas of the eyebrows. Avoid overdoing it and ending up withFrida’s eyebrows, so use phytociane sparingly when trying this method!

There are a lot of techniques for regrowing eyebrows before deciding to go for a tattoo, so if you know a tweezer freak, don’t panic! One of these eyebrow regrowth ways will help improve and strengthen the hair you have while nourishing your hair follicles to promote new hair regrowth!

Smoothing hair with oatmeal and milk mask

Those who need to naturally smoothen hair can achieve this with an oatmeal and milk mask. There is no doubt that the hair needs a lot of care and attention, as it is a mirror that reflects the general appearance of the person. The hair is exposed to many external factors that show it many different problems such as splitting, falling, breakage, dehydration, early graying and the appearance of dandruff, so hair must be taken care of. daily to maintain its health and appearance by using different hair care products, but it is better to use natural home recipes that do not contain harmful chemicals. One of the most beautiful hair masks that works to increase the softness of the hair, treat its breakage and restore its vitality, is the oatmeal and milk mask. To learn how to make an oatmeal and milk mask to soften hair for hair, read this article.

Smoothing hair with oatmeal and milk mask


Hair straightening

This mask works to nourish the hair, prevent its breakage, reduce hair regrowth, and restore health, vitality and luster to it, as it contains two important ingredients for hair health and beauty, which are oats and milk.

 Oatmeal and milk mask to soften hair

Ingredients

3 tablespoons of oats.

Half a cup of milk.

1 tablespoon of coconut oil.

1 tablespoon of bee honey.

How to make a mask of oats and milk.

Add half a cup of milk to a deep plate (balla), then add 3 tablespoons of oats to it, mix the ingredients well, they can also be mixed using a hand mixer to turn into a smooth paste.

Add bee honey to the previous mixture and mix the ingredients well together.

Finally, add coconut oil to the mixture and use the hand mixer again to get a homogeneous paste.

Your hair mask is now ready.

Put this mask on your hair and leave it for half an hour.

Use your usual shampoo and wash your hair with it.

Leave it to dry naturally

The benefit of smoothing hair by making a hair mask of oats and milk.

Oats: Oats are a rare ingredient used in hair care products and masks, but they have an important role in hair health. Soft and silky hair, oatmeal also works to maintain the balance of natural oils on the scalp and keeps the scalp healthy, treats dandruff, eliminates it and prevents its appearance

Watch here recipes to soften hair naturally

Milk : Milk is characterized by its moisturizing properties for hair. It also repairs dry and damaged hair and helps restore hair moisture. It also provides dull hair with natural shine and moisturizes the scalp. Milk provides hair with sufficient moisture that helps stop hair breakage.

Read oatmeal mask for oily hair here

Bee honey: Bee honey maintains the health, luster and softness of the skin. It is also a natural moisturizer for damaged hair, as it helps repair dry and shiny hair, increases its softness and hydration.
Coconut Oil: Coconut oil is the best for all hair types. It keeps the hair soft and silky. It also provides deep nourishment to dry hair. It also strengthens the hair from the inside. Coconut oil stimulates hair growth and controls hair loss.
In the end :
This mask contains great products, which help to control many hair problems and make the hair more healthy, as it increases the softness of the hair and reduces the frizz.
This mask transforms dull hair into healthier and shinier hair, as well as repairs damaged hair.
But you may encounter a slight problem while washing hair to get rid of oat flakes. You should not try to remove the oat residue from your hair while it is wet. Rather, it is preferable to remove it while the hair is dry by using a suitable hair comb. It helps to get rid of the oat residue easily without any cause. In any hair damage

Whitening the feet with 8 recipes

Most people only care about the face, and neglect other parts of the body. Why don’t you care about the feet and ways to whiten the feet? The foot is one of the parts of the body that others notice, such as the face. The feet are constantly exposed to pollution, dust and sunlight, and there are many creams and lotions available in the market that are intended for foot care only, but these commercial creams and lotions contain bleaching materials and harmful chemicals that affect the skin of the feet. Therefore, in this article, we offer you 8 home remedies that help whiten feet without high cost:

feet whitening

1- Whitening the feet with yogurt:

Yogurt contains lactic acid, which works effectively in lightening the skin, and thanks to this special property, yogurt is the best treatment for lightening the skin color. The lactic acid in yogurt removes the upper layer of dead skin cells from the feet, as well as scaly and dry skin . Yogurt also contains vitamins and proteins that make the skin glowing, bright and smooth.

Method: Plain yogurt is placed directly on the feet, and we massage them for 5 minutes, then leave for 15 minutes, and then rinse with water. It is preferable to do this treatment twice daily for a week until satisfactory results are obtained. You can also mix a few drops of rose water and glycerin into yogurt. Leave the mixture on the skin for a whole night and rinse the next morning.

2- Whitening the feet with milk:

The use of milk helps to lighten the skin effectively and well because it contains lactic acid, which is the best natural exfoliator for the skin. Milk penetrates the pores of the skin, cleanses them and lightens them, as it nourishes and moisturizes the skin.

Method: Bring a large piece of cotton and then immerse it in milk and then put it on the feet for 5 minutes, then rinse the skin with cold water.

3- Whitening the feet with coconut oil:

If the skin of the feet is dark due to dryness, coconut oil is an effective way to lighten them as it acts as a strong moisturizing factor for the skin. Massaging the feet daily using a few drops of warm coconut oil, wearing socks and sleeping, moisturizes the feet during the night, and thus the result is a good and effective lightening of the skin color of the feet.

4- Lemon and foot whitening:

Lemon contains natural bleaching properties that help get rid of the darkening of the feet. Excessive exposure to the sun causes pigmentation, and lemon helps solve this problem by applying lemon juice to the feet every day before bed, and you will notice the difference in just a week.

Method: We massage the feet with a slice of lemon for 5 minutes and wash after about 15 minutes, or you can mix lemon juice with a spoonful of honey and massage the feet with it, then wear socks and sleep and the next morning rinse with cold water.

5- Whitening the feet with tomatoes:

Tomatoes contain natural bleaching properties that effectively help lighten the skin of the feet. They also contain the antioxidant lycopene, which helps protect the feet from damage caused by sun exposure. Tomatoes reduce the sensitivity of the skin to ultraviolet rays. Tomatoes also remove dead cells from the skin.

Method: Rub a piece of tomato on the feet for 2-3 minutes, leave it to dry on the feet and then rinse with water, and it is preferable to repeat this method every day

6- Whitening the feet with potatoes:

Potatoes are used to lighten the skin and can also be used to lighten the armpit area. Potatoes whiten the skin as it is a natural blocker of melanin, which gets rid of any pigment in the skin.

Method: Prepare juice from potatoes or potato water and massage the feet and rub them for 15 minutes, then wash with warm water

7- Whitening the feet with baking soda:

Baking soda is used in many household and cosmetic uses, and the most famous of these uses is its ability to lighten the skin. Although it is not recommended to use it because it causes dehydration, it can be used through the following method

In a large dish, add 3 tablespoons of baking soda to the warm water, then dip the feet in them for no more than 15-20 minutes, then wash the feet and dry them well and apply a moisturizing cream after that so that no dryness or cracking occurs.

8- Turmeric and foot whitening:

Turmeric gets rid of dark marks in sensitive areas such as the face, and it is one of the best ways to lighten the skin. It is very effective when used with yogurt and lemon together.

Method:

Add a teaspoon of turmeric with a teaspoon of yogurt with a teaspoon of lemon juice, mix the mixture well and rub the feet well in circular motions. After 2-3 minutes, leave the mixture on the feet until it dries completely, then wash the feet with cold water

It is preferable to repeat this method daily until obtaining effective and satisfactory results

Natural scrub to fight dry skin

Today we present to you a way to prepare a natural body scrub that will rid you of the dryness caused by the cold weather during the winter, learn it with us and prepare it yourself in easy and simple steps and use it to always enjoy smooth skin.

Ingredients and method of application
Six tablespoons of sugar.
Three tablespoons of coconut oil.
Two drops of tea tree oil.
Two drops of almond oil.
Mix all ingredients well and store in an airtight container and use as needed

Clean the skin with rosemary and almond water

Cleaning the skin is one of the very important steps to maintain the freshness of the skin and prevent its multiple problems such as black heads, grains and fats. Those who wish to clean the skin naturally and effectively can do so with natural products and natural steps away from expensive products. Everyone, without exception, wants to have perfect skin free of flaws, so in this article we offer you, dear, some tips on cleaning the skin with almonds and water. The use of natural ingredients helps in obtaining a clear and fresh .

cleaning the skin

  • 50 grams of rosemary or 5 tablespoons of ground rosemary
  • 50 grams of almonds or half a cup
  • 200 grams of water or a glass of water

How to prepare a skin cleansing mask

  • First, clean the rosemary leaves well to get rid of dirt and dust
  • Then we boil the leaves in water to get rosemary water
  • Let the rosemary leaves cook for 5 minutes
  • After turning off the fire, leave it in the water to ferment for 15 minutes
  • When the water is warm, add the ground almonds to get a paste
  • The rest of the recipe can be kept in the refrigerator and used again within 10 days

How to use a face mask with rosemary and almond water

  • The face must first be rinsed with warm water
  • Take a small piece of the recipe (dough) and mix it with a little water
  • Then put it on the face with a good massage with the tips of the fingers on the chin, forehead and nose for at least a minute
  • After finishing, the face should be washed with cold water and dried well
  • It is preferable to do the cleaning process at night before going to sleep. But if the skin is oily and free of acne, it is better here to use the mask in the morning when you wake up.
  • This peel-off mask is not only suitable for the skin, but can also be applied anywhere on the body.
  • This mask is very effective with eczema problems and dry skin.

The properties of both almonds and rosemary in cleansing the skin

  • Rosemary water is the best remedy for maintaining the beauty of the face, because it is rich in iron, magnesium, zinc, as well as fatty acids and vitamins. And most importantly, it contains collagen, which gives the skin freshness and smoothness. Rosemary water also contains vitamin C, an antioxidant.
  • While almonds contain useful and excellent nutrients for the skin, each 100 grams of almonds provides many vitamins such as B1, B2, B3, B5 and others. It also contains fiber and proteins.

Almond oil and skin cleansing

Natural oils are one of the most important natural ways that are followed all over the world to enhance the beauty of the skin, such as almond oil and coconut oil, because natural oils contain a lot of vitamins and minerals that soothe cracked skin and help in obtaining pure and clear skin, even When applied to the hair, it gives healthy and shiny hair in addition to its benefits in promoting hair growth naturally

Properties and benefits of almond oil

1- A natural solution to skin stress

Skin is directly related to stress, anxiety and other environmental factors. And you can mix almond oil with some drops of essential oils of your choice to make a natural massage for the skin or even for the body. This massage reduces irritation, inflammation and itching in the skin and helps treat cracked skin problems. In addition, it can be used as a treatment for joint pain and muscle spasm.

2- A powerful moisturizer for dry skin

It is recommended to use almond oil in all cases where the skin is dry and cracked. It is preferable to use almond oil on wet skin with a light massage because mixing the oil particles with water facilitates the process of absorbing the oil by the skin. Lavender oil can also be added with almond oil to make a soothing face mask to reduce itching

3- A daily cleanser for the skin

You can rely on almond oil as a daily facial cleanser because it smoothly removes dirt and impurities without altering the natural balance of the skin. Put a few drops of almond oil on a cotton ball and pass it on the face to remove the remnants of makeup, dirt and dust, and you will notice the cleanliness of the skin after rinsing. In the event of dry skin or wrinkles, almond oil is used to make a facial massage

4- Treatment for dermatitis:

Almond oil can be used to treat sunburn, rashes, eczema, and other skin irritations. Massage with almond oil on the affected places to calm redness and inflammation. It can also be used as a moisturizer after hair removal to reduce irritation and remove residues resulting from hair removal if using a wax method.

5- Lip care:

Almond oil is used as a way to nourish the lips and as a treatment to soften cracked lips, and a teaspoon of sweet almond oil can be added to a teaspoon of shea butter and use this recipe every evening and apply it on the lips. Regular use helps to get moist lips that are not cracked and also keeps them from redness and inflammation